- Get link
- X
- Other Apps
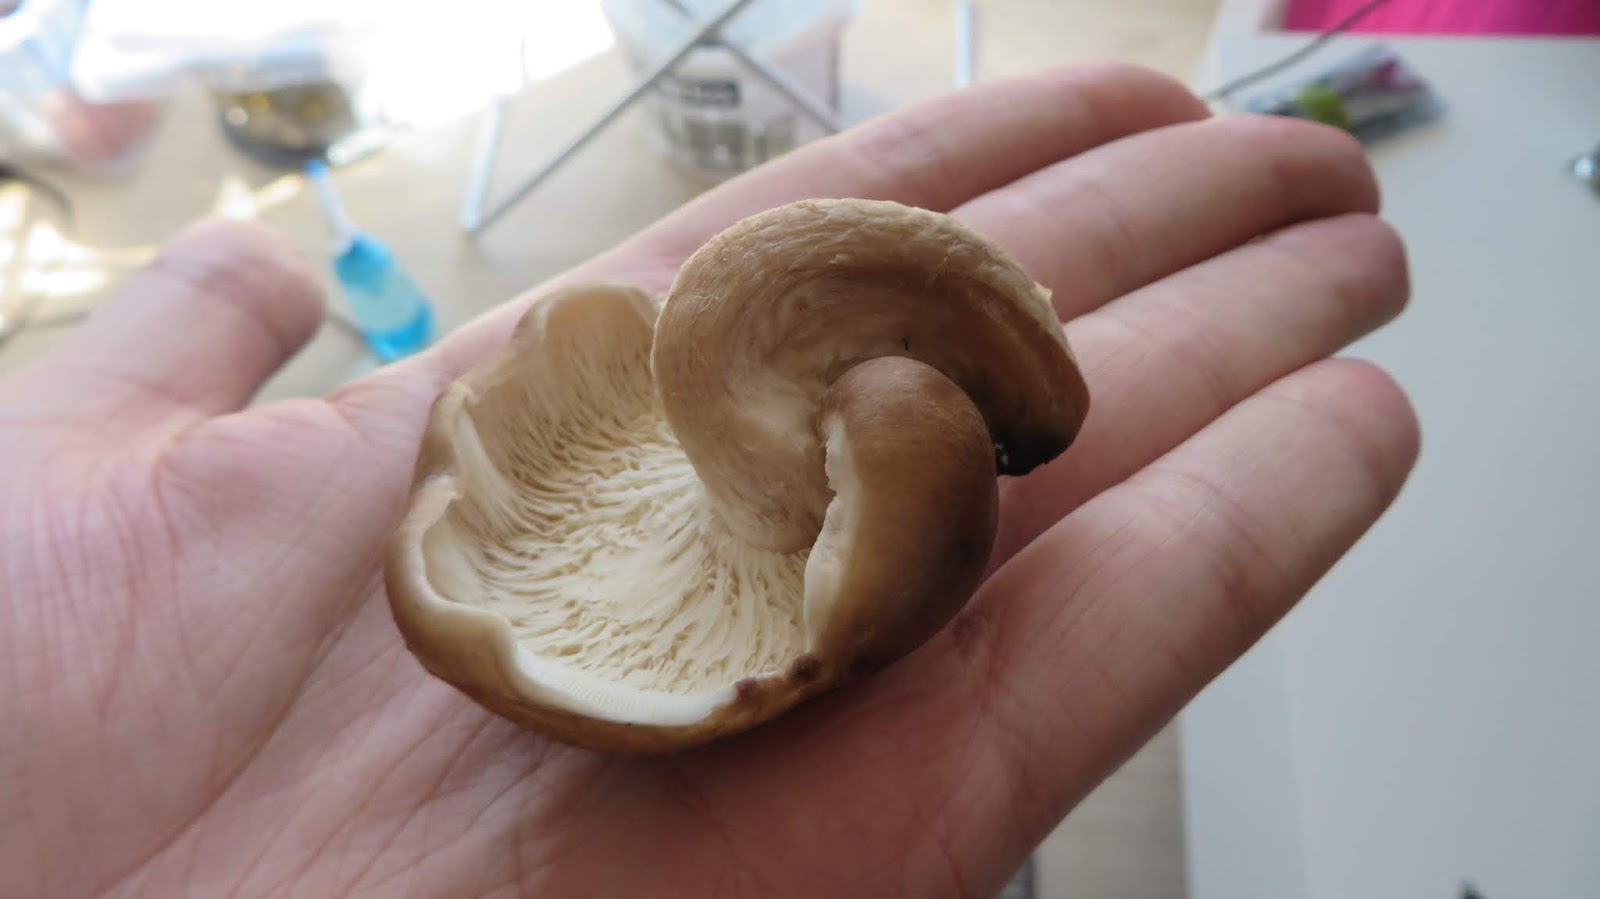
Last update: 4 May 2019. Finally added pics of shiitake fruiting body.

The latest addition to an already wide range of interests I have is biology. But how to segue from a background of IT and electronics to one of the most complex fields there are out there? You have to start small, that's for sure. Eventually, I think I found an optimal way to do that for an average layman like me.
I was fascinated with Thought emporium's video here:
and decided to give growing mushrooms a try. Why use it as a gateway to biology?
I'll attempt to paint a bigger picture on growing mushrooms at home, giving an overview of each possible option to do each step.
This post is a summary of what I found while trying to grow my first batch of edible mushrooms, including the specific guidelines and my experience in growing Shiitake mushrooms (no autoclave/pressure cooker used, inoculation with grain spawn instead of syringe). I deviated quite a bit from the standard practices when growing , so I thought the results can be of interest to someone else.
So why does virtually everyone use PF-Tek now?
PF-Tek in a nutshell:
These basic steps will apply to any tek where jars/drinking glasses are involved. Alas, there were some reasons why I could not apply PF-Tek in its original form:
Like you just saw, the process of growing mushrooms is divided into several cleanly-defined steps. Each of those can be performed differently depending on the level of your investment in mycology hobby and your experience.
What's important is that each of them CAN be done no matter how much tools/experience you have, the key is understanding what you're trying to accomplish at all times.
We'll concentrate on the easiest/cheapest ways to do each step, although I'll also briefly describe other methods and give some links to read up on them, for future reference.
I really recommend reading (or at least skimming through) one or more of the links below: those are PF-tek writeups that helped me most.
PF-Tek original guide
PF-Tek laid out simpler
One more good guide - EvilMushroom666's Take on BRF Cakes
Yet another good guide - Easy BRF Cakes Mushroom Growing Method
The author tried to collect all possible info for beginners here
Lots of guides for every occasion (unfortunately, the page had been taken down. Internet Archive to the rescue!
Here are some good highlights of Shiitake cultivation
About Lentinula edodes (Shiitake)
Shiitake BRF Growlog - Many Large Pictures
It just involves preparing your jars, making a still air box (if needed) and a fruiting chamber (always needed).
Mycelium in a jar needs oxygen to breathe (yes, just like animals it breathes oxygen and exhales carbon dioxide). At the same time, the contents of the jars are supposed to be sterile (or at least without too much contaminants), and we can't just leave them open because of that. PF-Tek makes use of polyfill (or pillow fluff outside US) as the material to let mushrooms breathe while keeping the germs out:

Polyfill isn't readily available where I currently reside, and buying a pillow just to rip it apart seemed a bit excessive, so I was forced to improvise - in fact, any synthetic "breathing" material will do, polyester for example.
Still air box can be omitted if you bought spores in a syringe - we'll get deeper into this later.
Fruiting chamber is the place where you'll actually grow the end result of your endeavor: fruits aka mushrooms. This is the last phase so you can actually start preparing your fruiting chamber during the colonization phase, since it mostly entails just waiting.
You can grow mushrooms on a wide variety of substrates: some more popular like brown rice flour + vermiculite, wood chips, sawdust and bird seed some more exotic like popcorn, cardboard or coffee grounds.
In fact, mushrooms will thrive on almost anything you throw them into - what seems to be the common denominator about this assortment of materials is that it's all plant-derived substance that has to be hydrated and full of nutrition.
Choosing your substrate will depend on the fungi you're trying to grow - look up its name and see which substrates it prefers. Here's some links to give you a broader picture:
List of wood-loving species
List of dung-loving species
Some more substrates and fungi that love them
Pressure cooking: about an hour.
Some substrates will be more nutritious than others, hence lucrative for other kinds of fungi - like mold. We don't want to grow mold, so depending on your substrate you'll either want to pasteurize or sterilize it.
Pasteurization is just a reduction of the number of germs in the substance: for instance, the milk you're buying in a store is pasteurized. Pasterization usually involves bringing the substance to moderate temperatures not exceeding 100°C (212 °F). Sterilization, on the other hand, attempts to eradicate all living organisms inside your jar.
You can read up more on sterilization vs pasteurization here.
Jars, or rather the substrates they usually throw into them, have to be sterilized, and usually people use pressure cookers to attain extreme conditions that will kill off any life inside them. I'm using another method: fractional sterilization. Unlike pressure cooking, it can be accomplished using only commodity kitchenware. Fractional sterilization is 3 hour-long boils of your jars spaced 24 hours apart.
Details about fractional sterilization are here.
Inoculation is the process of adding spores to the sterilized/pasteurized substrate.
If your spores came in the form of a syringe - you're in luck! Just add an extra hole to the jar lid, smear it with epoxy or silicon adhesive - this is going to be a dedicated "port" for spore delivery - and you can inoculate in open air. Flame-sterilize the needle and inject it into the "port" to knock up the jar without any nasty contams hitching a ride.
If your spores came as a grain spawn, you'll need some kind of germ-free environment to dispatch it to a jar. Average household's air holds a multitude of mildew spores, and doing inoculation in open air is likely to contaminate your jars.
The easiest way to establish the germ-free environment is a Still Air Box which I'll be using for inoculation. It's also built from the stuff you can get from your local supermarket.
Further reads:
Overview of different disinfection options
Building a laminar flow hood - more advanced and involved piece of technology for having the clean air during inoculation.
Consolidation: 1 week.
Colonization refers to a process when the fungus grows its mycelium out in all direction and eventually takes up all the substrate. This will be visible to the naked eye: when the jar turns completely white the colonization is complete. When the colonization is finished, fungus can fully utilize the substrate (i.e. extract nutrients from it).
If you grow your mushrooms at home temperature, you don't need any additional heating. Incubation is assistance in colonization if you decide to store the jars in less favorable conditions.
Consolidation starts after the colonization is complete - the substrate's turned all white and fluffy, and you just need to give it one more week to let mycelium make use of it. In time, substrate should start developing pins, that is, small colored aggregations of mycelium. As soon as the pins have emerged, it's time to "birth the cakes", or dump the substrate out of jars.
Fruiting is just an appearance of fruiting bodies - what people normally call "mushrooms". It takes place in a fruiting chamber - a container with high humidity maintained inside.
This phase starts when colonized substrate is dumped into the fruiting chamber, with an optional step of rehydrating it beforehand (it's called dunk and roll). All the grower needs to do from now on is to keep an eye on the chamber - the air inside should be fresh (oxygenated) and humid at all times. There's lots of fruiting chamber builds out there, but the most popular and easy to build seems to be Shotgun Fruiting Chamber (SGFC) - just a plastic container with holes in it (named so because hole pattern looks like it's been shot at with shotgun) with perlite in it to hold water and maintain humidity.
SGFC build
The mushrooms will be ready to get harvested in a week or two. Cut them off when mushroom's caps start to curve upwards. And that's it, really.
* Spores (as grain spawn or syringe - syringe is preferable and you'll see why below in this list)
* Transparent jars (glass or plastic) with wide mouth (i.e. the rim should be either the same width or the wider than the rest of jar's body). If you can't find jars like this it's not a deal breaker - it's just going to be a pain to get the colonized substrate out of them. You can either keep the substrate in the jar (results in lower yield) or have a hard time getting it out. 😊
* Still air box (SAB) - for when you have something other than a spore syringe.
* Something that can puncture the top of your jar. For example: handheld drill, nail and a hammer, a knife that you're willing to mess up when you attempt to pierce a metal lid with it, etc...
* Aluminum foil

* Some artificial fabric (polyester plaid, pillow fluff (polyfill) etc.) - should let mushrooms breathe, not letting contaminants it. Artificial cloths are resistant to decay when exposed to humidity.
* Large saucepan / soup tureen. To sterilize your jars.

* Rubber gloves. Any impenetrable gloves will do (not the garden variety)

* (Optional) 70% ethyl or isopropyl alcohol (this concentration works better than, say, 97% - see here to learn why) - to disinfect stuff. You can use soapy water instead, I just opted for rubbing alcohol because it doesn't require any additional effort - just grab a bottle and pour on anything you want disinfected.
* Some container where fruiting (i.e. mushrooms appearing) will happen. I just grabbed some buckets left over from construction works for free. Of course, they had to be thoroughly rinsed and aired to get rid of construction smell.

* Your substrate. Choose the kind of substrate which your particular mushrooms grow best on.
The mushrooms I'm trying to grow - Shiitake mushrooms - thrive on wood, therefore the best bet for substrate material is wood chips or sawdust.
Since it's kind of easy to obtain different kinds of substrate, I decided to try out different variations and compare which works best and requires least effort.
If you don't want to waste your time on substrates that don't work, I'll reveal which one worked right here: brown rice flour. Bird seed colonized, but did not sustain shiitake as it's a wood-loving species. Supplemented sawdust got colonized, but for some reason did not fruit either. Read on for more details.
* Variation 1. Brown rice flour + vermiculite.
* Brown rice or brown rice flour (BRF). BRF is hard to obtain in some places so I just bought a bag of brown rice and ground it manually.
* (Optional - if you couldn't find brown rice flour) Blender or coffee grinder. To crush the rice grains.

* Vermiculite - order online or use sawdust/wooden chips instead (haven't tried that yet). The purpose of vermiculite is to hold water and make substrate more loose.
* Variation 2. Wild bird seed (WBS).
* Bird seed, how much you'll need will depend on how many jars you want - you'll fill each of your jars about halfway to the top.

* Variation 3. Coffee.
*Coffee grounds. Many of us have a coffee machine at work or even at home:

These babies go through tons of coffee beans yearly, and after being ground and steamed, the beans just end up in landfills. We'll amend the situation slightly by reusing coffee grounds to grow fungi with. There's nothing tricky about the process of gathering those - just crack open the coffee machine, and you'll see those hockey puck-shaped grounds:

Fill your jar almost to the brim with them. You're all set!
* Variation 4. Cardboard.
*Scraps of corrugated cardboard. Corrugated cardboard has more airy texture and is easier to colonize.

*Any plastic or glass food container.

* Variation 5. Plain and supplemented sawdust.
* Sawdust. You don't even have to buy it - people saw wood all the time and byproducts are usually thrown away. Pay a visit to the nearest park/forest/sawmill and see what it has to offer you.
* Supplementation. I threw in some brown rice flour left over from substrate number one to add nutritional value to sawdust. Although I suspected that wasn't really necessary and prepared another jar with plain sawdust in it. It's going to be interesting to compare the growth rate of plain vs supplemented sawdust.


Bad news for those who had their spores come as grain spawn - you'll have to construct a Still air box (SAB) to be able to inoculate the jars later on. SAB is just a huge container with two pluggable holes for hands.
You can take a look at some example builds of SABs if you follow those links:
Still Air Box design/prototyping/theory, TL SAB tek, and another Still Air Box build.


That was it! Here's what ready SAB looks like:
Refer to any of the PF-Tek links from the theory section, for example this one, in case something is not clear (e.g. proportions).


Mix it all up until the substance is uniform. We want to aim for airy and well-hydrated substrate, so add more vermiculite/water if it looks too dry or clumpy.
* Variation 2. Coffee.

You don't need to prepare them, although supplementing them with sawdust would probably improve the quality. Adding vermiculite you obtained for the first substrate may also help if it looks too clumpy.
* Variation 3. Wild bird seed (WBS)


* Variation 4. Cardboard.
Weird enough, none of the cardboard teks mention any sterilization or pasterization. This is the reason I'm using just a plastic container to house mycelium-occupied cardboard pieces.
As to the reason why those simple precautions against airborne contaminants are omitted - it remains to be found out. I ran one experimental batch just to see who gets to colonize cardboard first: mushrooms or mold.


* Variation 5. Supplemented sawdust.
To compare the performance of supplemented vs plain sawdust, I'll show you how to prepare both kinds of sawdust substrate.


There's not much to tell about two remaining boils - they're spaced 24 hours apart as well, and after the last boil you have your jars sterilized. Time to launch some beneficial life into them!
I just prepared a short video to demonstrate how inoculation in a still air box works. This is one of the situations where one picture is worth a thousand words, that's why I made a POV style video of it. Things to keep in mind:
Make sure to wash your equipment after you're finished with inoculation.

Now that the jars are full of mycelium you can shake them to distribute the spawn evenly. Now it's time to put them away for a long time and give them time to grow through substrate.

* Variation 4: cardboard substrate.
Inoculation is done in open air (this is an experiment, remember?) and it's basically just laying layer after layer of corrugated pieces of cardboard while sprinkling some grain spawn in-between every now and then.


I recorded a timelapse of colonization process with my action camera to see at a glance which substrate works best.
Wild bird seed was the fastest to colonize (2 weeks + 6 days of consolidation seemed enough to birth it), followed by Sawdust (20 days + 6 days of consolidation then birthing) and Brown rice flour (42 days to birthing).
I believe my BRF jar can't be considered representative of BRFs in general because I stuffed way too much substrate in that jar. Looking at the timelapse it's clear that after about 20 days the colonization process stalls and continues at a turtle's pace, however top layers proceed with consolidation. I had to birth the underdeveloped cake prematurely (who knew that happens to mushroom jars too, right?).
What about cardboard? This undertaking seemed dubious, but every day I still snapped a pic of cardboard with my compact camera. The result is predictable: eventually the growth process stalled and fungi occupied cardboard sheets. Myth busted: this idiotic approach could not work and it didn't. Maybe it had a chance if proper pasteurization (note that I'm not saying sterilization - cardboard is not that nutritious) techniques were followed?
Common pitfalls during colonization step:
A) Substrate has dried up.
What do I do now? Well, adjust the water content for future substrates.
Is there anything I can do with the jar? Yes, but the probability of success will drop substantially. Boil some water and let it cool to room temperature. Then slowly pour it on top of the jar so that it seeps through your air filter and inside the jar. If you're lucky and you didn't bring in too much contaminants, you'll observe the colonization commence again.
B) Substrate lacks certain nutrients.
What do I do now? Think about what this substrate lacked (for instance, coffee ground are rich in nitrogen but that's pretty much it. Can't grow mushrooms on pure nitrogen).
Is there anything I can do with the jar? Throw it away.
This might also be an indication of too high water content: if the substrate looks like it is "swimming" in a pool of water at the bottom of the jar, you should adjust the amount of water you add during the next substrate preparation. Normal substrate should be soaked uniformly.
Is there anything you can do to save a contaminated jar? Depends on how far underway is colonization process. Think how ready jar contents are for dumping and fruiting.
If it's almost colonized and there's just a few spots of mold, mycelium may actually take over. Or, if it does not, you can always birth that jar and cut off the infected part.
For substrates that are not even remotely ready for birthing, open up the jar and dispose of the substrate, then wash the jar thoroughly.
To let fungi develop the fruiting body, we'll have to emulate the environment of the forest when the weather is prime for fruiting as close as possible. Here's what this boils down to:
The simplest and the most effective fruiting chamber people usually build is a shotgun fruiting chamber, which is simply a huge transparent container with holes in it sitting somewhere with not too much light.
What I decided to try out was to make a similar chamber out of an opaque container. My expectation was that the holes will provide all the necessary dim light to mushrooms inside. I'll have to expose the chamber to bright light for this to be possible, instead of finding a spot with dim light for a transparent chamber in my apartment.
Here's the recipe for my opaque shotgun fruiting chamber:


What's a pinning trigger? It's as simple as something that tells mycelium that it's time to fruit. One trigger that all mushrooms share is cold. Prolonged stay in cold temperatures gives mushroom a hint: "Hey, winter is coming, so it's now or never!". Overnight stay in the fridge is usually enough to imitate this trigger:

Again, reading about specific triggers for you mushroom is a good idea too. The trigger that's specific to shiitakes, for example, is striking the substrate. You can read more about it here, but in essence this tells mycelium (that grows on dead wood in nature) that the log has fallen. Of course, we grow on softer substrates and there's no way we could strike the jar with a hammer, but slapping it may help trigger pinning.
Ok, so you've got everything prepared for birthing by now: you built your fruiting chamber, froze and slapped the substrate jar silly, bought a spray bottle and filled it with clear water.
Most growing teks suggest you fill the bottom of the fruiting chamber with perlite: it will retain the moisture and maintain high humidity. Perlite turned out to be unobtainium in my city, and I did not have time to wait for an online order to come in. Personally, I found that replacing it with vermiculite works well enough: vermiculite is also good at holding water and gradually evaporating it.


I advice housing your cakes on coasters: anything that can serve as a separator between cake and perlite/vermiculite. Without it mycelium will attempt to colonize the whole bottom layer of your fruiting chamber!
This is all there is to birthing the jars, really. Sounds sophisticated but it's as simple as dumping the contents of a jar into the fruiting chamber.
Information specific to tightly packed jars.
This is what happens when substrate was tamped down too much. After 40 days of colonization I decided I'll birth this jar prematurely - it looked like there was no room at all for mycelium to grow.
My theory was confirmed when I popped open the jar. There was so little space that mycelium deemed it easier to climb up through the cloth rather than try and go down.
There's nothing unusual you have to do to birth jars like this one, I just wanted to leave it there for people curious what it will look like. Also as a precaution, obviously.
Information specific to coffee ground substrate:
Coffee grounds was another substrate that didn't live up to my expectations. I'm not sure what's to blame for shiitake refusing to grow on coffee: the fact that coffee grounds is not good enough for wood-dwelling shiitakes or maybe even total unsuitability of coffee for mushroom growing business.
I'll have to try growing something simpler on coffee grounds.
Anyway, here's what coffee jar looked like when I opened it 40 days after inoculation:
Top layer (about 1/3) was barren and dried, but under that there were clumps of colonized grounds! About half of the volume of the jar was filled with those clumps, actually:
Having taken them out carefully, I thought I'll give open air inoculation a try. When half of the jar is already filled with mushroom, occupation of the other half should be faster than mould taking a foothold in there. So I've filled the same jar with colonized lumps of coffee, careful not to break them up, and topped it with pure sawdust. We'll see how colonization of this one goes.

UPDATE 2019-05-15: Decided to open the jar. Due to the fact that I've been using wet sawdust from the forest, contents of the jar now smell like decomposing forest floor leaves. Threw it all away.
UPDATE 2019-05-06: Still no signs of any growth in this jar, benevolent or otherwise, almost 2 months in. Continuing my observations.


After each spraying the walls should be as wet as possible - think rainforest.

Aside from that, nothing specific - keep an eye out for the mold and cut it off if it appears on your cakes. Now that I've mentioned that, remember that tightly packed BRF jar I had to birth prematurely? That uncolonized portion of the cake at the bottom is the one that's most predisposed toward mildew.
Notes on trying to fruit Wild bird seed cake:
Because WBS cake took only 2 weeks to colonize, I was anticipating fast first flush from that one. No dice - it just sat there and browned (this is a sign of ageing in Shiitake mycelium).

After a month of waiting for something to happen, I had to face it: either Shiitake will only grow on wood or there's something wrong with my fruiting chamber. Since every source on Shiitake mushrooms will point at the fact that it is, indeed, a wood-loving species, I accepted the first explanation more readily.
I didn't want to let the whole cake go to waste, and thought of something I could do to make use of the old cake: inoculate other substrates with it! (Caution - this is an ongoing experiment. I've yet to actually inoculate substrates with these dried cake pieces. Let me know if you did that and what was the outcome).


Inoculation date: 2019-02-05
Birth date: 2019-03-17
2019-04-08: After birthing the cake, it just sat in the chamber and aged (browned). After a month of stagnation I decided to do something about it - fruiting should've taken 2 weeks at the most!
1) The surface of the cake felt dry to the touch at times, and I figured that too much humidity was lost through the holes, so I taped some of them with an ordinary scotch tape.

2) To further increase water content in both cakes (BRF and supplemented sawdust) I dunked them for 24 hours and rolled in vermiculite again.

This seemed to have the desired effect! First mushroom started sprouting on 2019-04-14.
Inoculation date: 2019-02-05
Birth date: 2019-02-25
Stopped growing them and chopped for inoculation material on: 2019-03-24
Coffee grounds
Inoculation date: 2019-02-05
Opened the jar and inoculated sawdust with clumps of colonized coffee on: 2019-03-18
Sawdust cakes
All either dried out or spoiled. Sawdust needs additives that will store the water uniformly around the substrate. With pure sawdust it tended to just pool at the bottom.
One exception from this rule was one jar that neither sprouted mold nor mushroom mycelium: it had high water content, and mushroom started expanding from one spot inside, then the growth stopped to a crawl and finally it somehow shrank back! I'm attributing this to the fact that the environment wasn't contaminated, but didn't contain enough nutrition.
Supplemented sawdust cakes (only one survived to birthing phase)
Inoculation date: 2019-02-25
Birth date of the first one: 2019-03-19
I've waited until May to see some fruits on that cake, but the cake just kept building up brown crust on surface:

This crust felt tough and dry to the touch, and eventually I had to throw this cake away. I suspect the reason for that crust appearing was low humidity, as the other cake that has been fruiting at the same chamber at the time also developed the same kind of protective brown skin.
2) Shiitake mushrooms will readily and quickly colonize Wild bird seed, but don't actually fruit on pure WBS cakes. Therefore WBS should be used as a way to quickly get spawn grain for further colonization.
3) Open air inoculation techniques are tricky to master (or they don't work at all). Beware of teks that include them. I'll definitely try growing on cardboard again: basic mushrooms like white button (Agaricus bisporus) might work.
4) Cardboard-grown mushroom should not be considered edible: cardboard is not just wood pulp, factories supplement it with a heap of additives, aside from glueing together the corrugated layers and printing on top of it.
5) Pure sawdust is awful at retaining moisture - almost all of my non-supplemented cakes either dried out or bloomed with mold. In one case where it was neither, mycelium started growing and collapsed - looks like you can't sustain mycelium with only cellulose! I'll try combining BRF substrate (vermiculite holds water, rice flour adds nutritional value) with sawdust going forward - theoretically it should be the best jar substrate for wood-loving shrooms.
6) Pure coffee grounds can't sustain shiitake mycelium. I'll definitely attempt to utilize coffee again - maybe white buttons or oysters (Pleurotus genus mushrooms) will take a liking to ground coffee, unlike Shiitake?
Although my newly-acquired mushroom growing experience tells me that this is not about incompatibility of gourmet mushrooms and coffee grounds: I have to agree with this article on that matter. It concisely describes the problems of growing on coffee. My conclusion: coffee grounds should be used as a supplementation to increase nitrogen content in substrates (for instance, these guys say that sawdust has to be supplemented with nitrogen to make a good substrate)
7) Optimal diameter for a hole in the jar top seems to be around 1 cm. (1/2 in.) or even smaller.
My first attempts at piercing lids always yielded small holes, but then I thought I'd experiment with bigger diameters - to provide access to even more air for mycelium. Unfortunately no matter what substrate, bigger holes are also an escape route for evaporating moisture, and most of the jars with big holes in lids dry up prematurely.

8) Rolling the cake in vermiculite is an important part of the famous "Dunk&roll" process. I just dunked without rolling on my first batches and they did not fruit at all. Dunking them, peeling the crust off and rolling seemed to do the trick.
9) I've yet to discover if using perlite for fruiting chamber will increase the yield as opposed to vermiculite.
 Last update: 4 May 2019. Finally added pics of shiitake fruiting body.

Background
Technology, biology, chemistry and natural sciences in general are becoming more and more accessible by people with even modest incomes. The upshot is a multitude of projects carried out by creative people around the world, each of them unique and interesting to follow via Internet. That's what I like to do in my spare time - anything out of that diversity might ignite a spark and captivate me.The latest addition to an already wide range of interests I have is biology. But how to segue from a background of IT and electronics to one of the most complex fields there are out there? You have to start small, that's for sure. Eventually, I think I found an optimal way to do that for an average layman like me.
I was fascinated with Thought emporium's video here:
and decided to give growing mushrooms a try. Why use it as a gateway to biology?
- It gives you tangible (and even edible) results.
- It's easy to to at home, without any specialized equipment (well, autoclave/pressure cooker is probably a bit of a stretch to this statement, but we'll find a way to do without it for starters).
What this post is about
Although the learning curve can't be called too steep (look at how Justin lays it out in video above! 1-2-3 and you have your mushroom jars ready to get colonized), I'd say there's still a multitude of pitfalls people should know of, even in the very beginning.I'll attempt to paint a bigger picture on growing mushrooms at home, giving an overview of each possible option to do each step.
This post is a summary of what I found while trying to grow my first batch of edible mushrooms, including the specific guidelines and my experience in growing Shiitake mushrooms (no autoclave/pressure cooker used, inoculation with grain spawn instead of syringe). I deviated quite a bit from the standard practices when growing , so I thought the results can be of interest to someone else.
Glossary
- Fungi - a whole kingdom of living organisms that includes ordinary mushrooms that we know and love alongside with mold and yeast infection. In most contexts it's just synonymous with the word "mushrooms" - unless we're speaking advanced biological experiments.
- Spores - fungal seeds. This is how mushrooms reproduce. Applied to mushroom growing, they mostly come in the form of syringe filled with water-spore mix.
- Mycelium - mushroom "roots", white and fluffy stringy substance.
- Tek - technology, i.e. specific guidelines you follow to attain some goal (most commonly, grow mushrooms)
How to grow mushrooms at home
The most widespread tek used to grow mushrooms at home is called PF-Tek. Any manual on growing shrooms at home you'll find online is likely to be a modification (they are sometimes generically referred to as BRF cakes tek) or even carbon copy of the original PF-Tek conceived in 1992 by Robert McPherson (Psylocybe Fanaticus). As you must have guessed already, it was used to grow magic mushrooms, but in fact it's a versatile technique that will accommodate any type of mushrooms.So why does virtually everyone use PF-Tek now?
- It's approachable with tools and ingredients that average person either has in their home already, or can buy in the nearest convenience store.
- Simplicity of scaling - if you want more mushrooms, you just mix more substrate and fill more jars. Nothing fancy here.
PF-Tek in a nutshell:
- You fill some canning jars with substrate of Brown Rice Flour (BRF) mixed with vermiculite,
- You sterilize those jars in pressure cooker to give mycelium headstart in growing (otherwise mildew will colonize your rich in nutrients substrate quicker)
- You inoculate them (i.e. shoot a syringe of mushroom spores inside) and just let mycelium colonize the jars. No sterile environment needed (and it's a huge plus for amateur growers!) as the spores or mycelium are injected through the port in a jar, i.e. jars don't have to be opened and no airborne contaminants have the chance to get in.
- When the jars' content turn completely white, it's time to dump the "cakes" out of their jars and let mushrooms sprout.
These basic steps will apply to any tek where jars/drinking glasses are involved. Alas, there were some reasons why I could not apply PF-Tek in its original form:
- It requires pressure cooker or autoclave to sterilize the jars.
Now, all fungi enthusiasts will urge you to pony up and buy a used pressure cooker, and rightly so - the most common case of failure in the process of growing mushrooms is having mold colonize your substrate before mycelium does. Boiling the jars at elevated pressure is the best way to kill off the germs inside it.
But what if this mushroom hobby doesn't take off? I didn't want another bulky gizmo gathering dust in my closet after deciding that this hobby is not for me. The most natural way to get into mycology seems to find a way to grow your first couple of batches with a barebones setup, and add equipment as I go.
- Your spores have to be packed in syringe.
In PF-Tek, you flame sterilize the needle and inject the spores directly through the sealed top of your jar, avoiding contamination this way.
What I incidentally bought was a ziplock of colonized grain. To inoculate a jar with it, you'd need to crack the lid of a jar, and doing that will surely result in airborne spores infiltrating the substrate. - This one is a bit silly, but I couldn't find polyfill to stuff it into the jar lid - I'm using something that is simpler to procure where I live at the moment.
Like you just saw, the process of growing mushrooms is divided into several cleanly-defined steps. Each of those can be performed differently depending on the level of your investment in mycology hobby and your experience.
What's important is that each of them CAN be done no matter how much tools/experience you have, the key is understanding what you're trying to accomplish at all times.
We'll concentrate on the easiest/cheapest ways to do each step, although I'll also briefly describe other methods and give some links to read up on them, for future reference.
I really recommend reading (or at least skimming through) one or more of the links below: those are PF-tek writeups that helped me most.
PF-Tek original guide
PF-Tek laid out simpler
One more good guide - EvilMushroom666's Take on BRF Cakes
Yet another good guide - Easy BRF Cakes Mushroom Growing Method
The author tried to collect all possible info for beginners here
Lots of guides for every occasion (unfortunately, the page had been taken down. Internet Archive to the rescue!
Steps + approximate timeline
Before attempting to grow your first batch, try to find some guidelines for the specific mushroom you're trying to grow - this didn't occur to me at first, but many aspects of growing Shiitake are different from the more common mushrooms like Portobello and Oysters. For instance, I found out that Shiitake take much longer to colonize their substrate, and require cold shock as a trigger to start fruiting.Here are some good highlights of Shiitake cultivation
About Lentinula edodes (Shiitake)
Shiitake BRF Growlog - Many Large Pictures
Materials preparation
Takes: about 30 minutes.It just involves preparing your jars, making a still air box (if needed) and a fruiting chamber (always needed).
Mycelium in a jar needs oxygen to breathe (yes, just like animals it breathes oxygen and exhales carbon dioxide). At the same time, the contents of the jars are supposed to be sterile (or at least without too much contaminants), and we can't just leave them open because of that. PF-Tek makes use of polyfill (or pillow fluff outside US) as the material to let mushrooms breathe while keeping the germs out:

Polyfill isn't readily available where I currently reside, and buying a pillow just to rip it apart seemed a bit excessive, so I was forced to improvise - in fact, any synthetic "breathing" material will do, polyester for example.
Still air box can be omitted if you bought spores in a syringe - we'll get deeper into this later.
Fruiting chamber is the place where you'll actually grow the end result of your endeavor: fruits aka mushrooms. This is the last phase so you can actually start preparing your fruiting chamber during the colonization phase, since it mostly entails just waiting.
Substrate preparation
Takes: anywhere from 5 to 30 minutes depending on substrate in question.You can grow mushrooms on a wide variety of substrates: some more popular like brown rice flour + vermiculite, wood chips, sawdust and bird seed some more exotic like popcorn, cardboard or coffee grounds.
In fact, mushrooms will thrive on almost anything you throw them into - what seems to be the common denominator about this assortment of materials is that it's all plant-derived substance that has to be hydrated and full of nutrition.
Choosing your substrate will depend on the fungi you're trying to grow - look up its name and see which substrates it prefers. Here's some links to give you a broader picture:
List of wood-loving species
List of dung-loving species
Some more substrates and fungi that love them
Sterilization/Pasteurization
Fractional sterilization: 3 days and 3 hours.Pressure cooking: about an hour.
Some substrates will be more nutritious than others, hence lucrative for other kinds of fungi - like mold. We don't want to grow mold, so depending on your substrate you'll either want to pasteurize or sterilize it.
Pasteurization is just a reduction of the number of germs in the substance: for instance, the milk you're buying in a store is pasteurized. Pasterization usually involves bringing the substance to moderate temperatures not exceeding 100°C (212 °F). Sterilization, on the other hand, attempts to eradicate all living organisms inside your jar.
You can read up more on sterilization vs pasteurization here.
Jars, or rather the substrates they usually throw into them, have to be sterilized, and usually people use pressure cookers to attain extreme conditions that will kill off any life inside them. I'm using another method: fractional sterilization. Unlike pressure cooking, it can be accomplished using only commodity kitchenware. Fractional sterilization is 3 hour-long boils of your jars spaced 24 hours apart.
Details about fractional sterilization are here.
Inoculation
Takes: 1 to 2 hours.Inoculation is the process of adding spores to the sterilized/pasteurized substrate.
If your spores came in the form of a syringe - you're in luck! Just add an extra hole to the jar lid, smear it with epoxy or silicon adhesive - this is going to be a dedicated "port" for spore delivery - and you can inoculate in open air. Flame-sterilize the needle and inject it into the "port" to knock up the jar without any nasty contams hitching a ride.
If your spores came as a grain spawn, you'll need some kind of germ-free environment to dispatch it to a jar. Average household's air holds a multitude of mildew spores, and doing inoculation in open air is likely to contaminate your jars.
The easiest way to establish the germ-free environment is a Still Air Box which I'll be using for inoculation. It's also built from the stuff you can get from your local supermarket.
Further reads:
Overview of different disinfection options
Building a laminar flow hood - more advanced and involved piece of technology for having the clean air during inoculation.
Colonization/Incubation and Consolidation
Colonization/Incubation: 3-5 weeks.Consolidation: 1 week.
Colonization refers to a process when the fungus grows its mycelium out in all direction and eventually takes up all the substrate. This will be visible to the naked eye: when the jar turns completely white the colonization is complete. When the colonization is finished, fungus can fully utilize the substrate (i.e. extract nutrients from it).
If you grow your mushrooms at home temperature, you don't need any additional heating. Incubation is assistance in colonization if you decide to store the jars in less favorable conditions.
Consolidation starts after the colonization is complete - the substrate's turned all white and fluffy, and you just need to give it one more week to let mycelium make use of it. In time, substrate should start developing pins, that is, small colored aggregations of mycelium. As soon as the pins have emerged, it's time to "birth the cakes", or dump the substrate out of jars.
Fruiting
Takes: 1-2 weeks, but in my experience it can go up to a month or two.Fruiting is just an appearance of fruiting bodies - what people normally call "mushrooms". It takes place in a fruiting chamber - a container with high humidity maintained inside.
This phase starts when colonized substrate is dumped into the fruiting chamber, with an optional step of rehydrating it beforehand (it's called dunk and roll). All the grower needs to do from now on is to keep an eye on the chamber - the air inside should be fresh (oxygenated) and humid at all times. There's lots of fruiting chamber builds out there, but the most popular and easy to build seems to be Shotgun Fruiting Chamber (SGFC) - just a plastic container with holes in it (named so because hole pattern looks like it's been shot at with shotgun) with perlite in it to hold water and maintain humidity.
SGFC build
The mushrooms will be ready to get harvested in a week or two. Cut them off when mushroom's caps start to curve upwards. And that's it, really.
What I've used
Most of it (except spores maybe) can be sourced from local hypermarkets like Auchan, Castorama and Leroy Merlin.* Spores (as grain spawn or syringe - syringe is preferable and you'll see why below in this list)
 |
 |
| That's what I've gotten myself - a ziplock labeled with a typo on seam. | What I should've gotten - spore syringe. |
* Transparent jars (glass or plastic) with wide mouth (i.e. the rim should be either the same width or the wider than the rest of jar's body). If you can't find jars like this it's not a deal breaker - it's just going to be a pain to get the colonized substrate out of them. You can either keep the substrate in the jar (results in lower yield) or have a hard time getting it out. 😊
 |
| Leftover jars from canned meat just came in handy! |
* Still air box (SAB) - for when you have something other than a spore syringe.
 |
| Ingredients for my SAB: clear plastic tote (container), 2 PVC flanges for plumbing. |
* Something that can puncture the top of your jar. For example: handheld drill, nail and a hammer, a knife that you're willing to mess up when you attempt to pierce a metal lid with it, etc...
* Aluminum foil

* Some artificial fabric (polyester plaid, pillow fluff (polyfill) etc.) - should let mushrooms breathe, not letting contaminants it. Artificial cloths are resistant to decay when exposed to humidity.
 |
| I just bought the cheapest synthetic piece of cloth: note the label saying 100% polyester. |
* Large saucepan / soup tureen. To sterilize your jars.

* Rubber gloves. Any impenetrable gloves will do (not the garden variety)

* (Optional) 70% ethyl or isopropyl alcohol (this concentration works better than, say, 97% - see here to learn why) - to disinfect stuff. You can use soapy water instead, I just opted for rubbing alcohol because it doesn't require any additional effort - just grab a bottle and pour on anything you want disinfected.
 |
| Ethanol with a funky violet hue - supposedly to keep undemanding alcoholics from drinking it. |
* Some container where fruiting (i.e. mushrooms appearing) will happen. I just grabbed some buckets left over from construction works for free. Of course, they had to be thoroughly rinsed and aired to get rid of construction smell.

* Your substrate. Choose the kind of substrate which your particular mushrooms grow best on.
The mushrooms I'm trying to grow - Shiitake mushrooms - thrive on wood, therefore the best bet for substrate material is wood chips or sawdust.
Since it's kind of easy to obtain different kinds of substrate, I decided to try out different variations and compare which works best and requires least effort.
If you don't want to waste your time on substrates that don't work, I'll reveal which one worked right here: brown rice flour. Bird seed colonized, but did not sustain shiitake as it's a wood-loving species. Supplemented sawdust got colonized, but for some reason did not fruit either. Read on for more details.
* Variation 1. Brown rice flour + vermiculite.
* Brown rice or brown rice flour (BRF). BRF is hard to obtain in some places so I just bought a bag of brown rice and ground it manually.
 |
 |
| Regular white rice, like in that container to the left, is not going to cut it. |
Store-bought brown rice, ready to be ground into flour. |
* (Optional - if you couldn't find brown rice flour) Blender or coffee grinder. To crush the rice grains.

* Vermiculite - order online or use sawdust/wooden chips instead (haven't tried that yet). The purpose of vermiculite is to hold water and make substrate more loose.
 |
| No luck finding vermiculite in garden shops where you live? Online delivery will save the day. |
 |
| 10L bag of vermiculite is more than enough for 50+ jars. |
* Variation 2. Wild bird seed (WBS).
* Bird seed, how much you'll need will depend on how many jars you want - you'll fill each of your jars about halfway to the top.

* Variation 3. Coffee.
*Coffee grounds. Many of us have a coffee machine at work or even at home:

These babies go through tons of coffee beans yearly, and after being ground and steamed, the beans just end up in landfills. We'll amend the situation slightly by reusing coffee grounds to grow fungi with. There's nothing tricky about the process of gathering those - just crack open the coffee machine, and you'll see those hockey puck-shaped grounds:

Fill your jar almost to the brim with them. You're all set!
* Variation 4. Cardboard.
*Scraps of corrugated cardboard. Corrugated cardboard has more airy texture and is easier to colonize.

*Any plastic or glass food container.

* Variation 5. Plain and supplemented sawdust.
* Sawdust. You don't even have to buy it - people saw wood all the time and byproducts are usually thrown away. Pay a visit to the nearest park/forest/sawmill and see what it has to offer you.
 |
| Full bag of sawdust I've gathered in a park nearby. Took me about 15 minutes, and this bag will fill many jars. |
* Supplementation. I threw in some brown rice flour left over from substrate number one to add nutritional value to sawdust. Although I suspected that wasn't really necessary and prepared another jar with plain sawdust in it. It's going to be interesting to compare the growth rate of plain vs supplemented sawdust.
The process of growing mushrooms, applied
Materials preparation
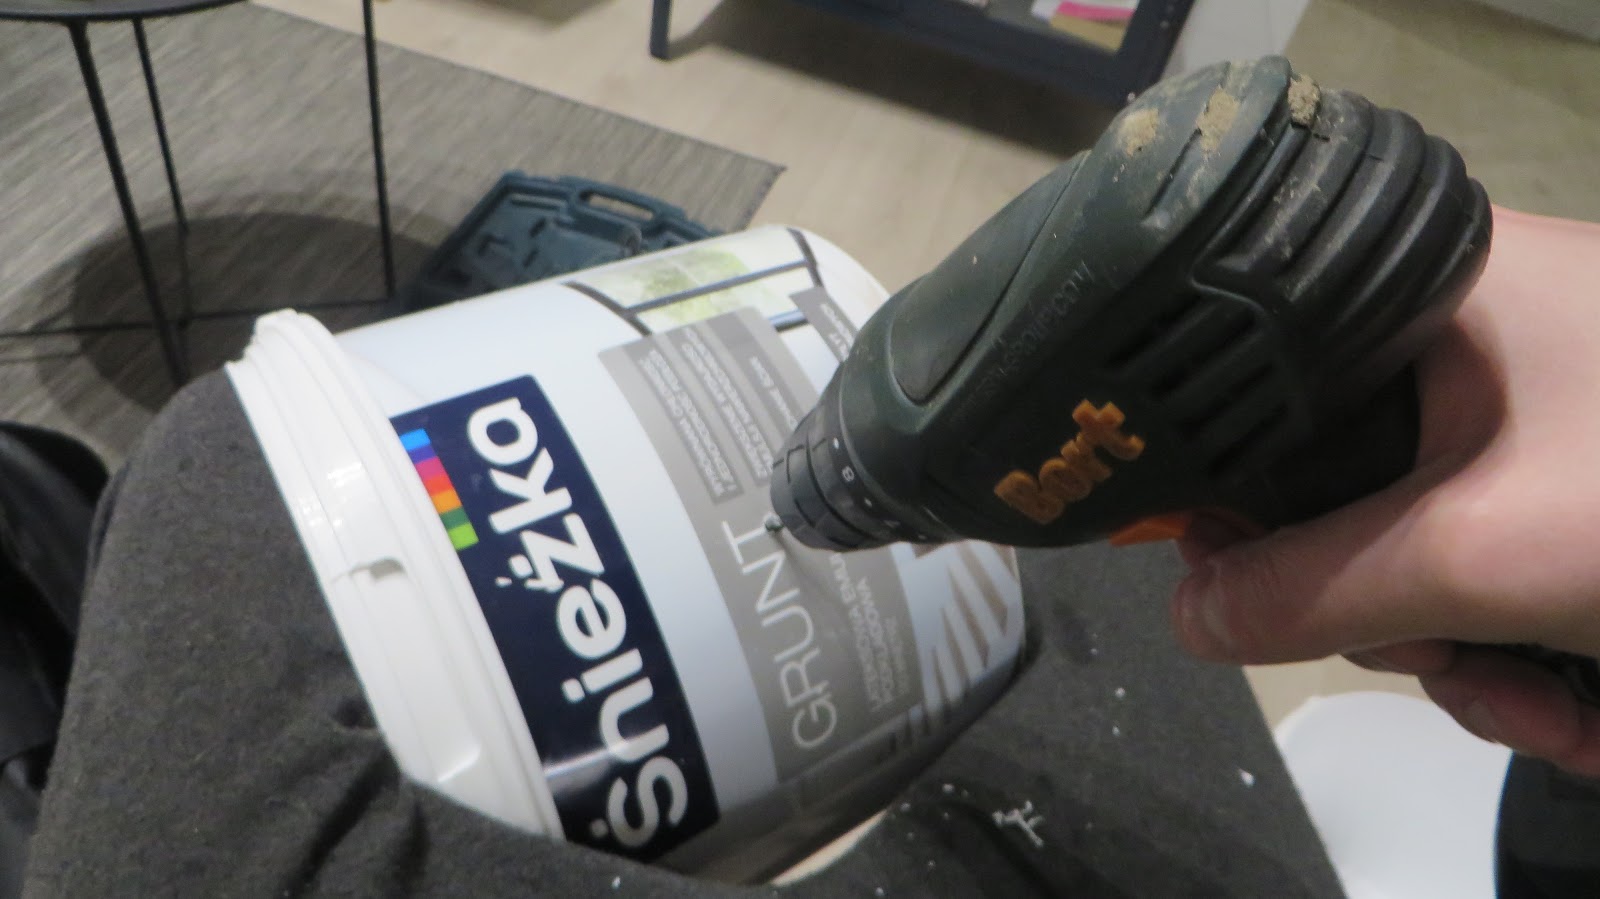
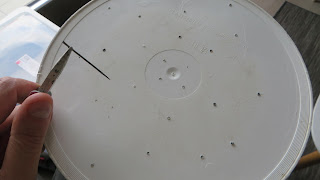
As I mentioned above, we'll have to prep the jars to let mushrooms breathe. If you have polyfill (pillow fluff) for sale where you live - this page is for you. If not - let's proceed with making our makeshift jar filters!- Drill/poke the holes in the lids. Size does not matter much - some air exchange must take place through those.
 |
| Left to right: the good, the bad and the ugly. |
- Cut the synthetic cloth into small square scraps, so that they cover the mouth of the jar when the lid is screwed on.

- This is what end result is supposed to look like:

Bad news for those who had their spores come as grain spawn - you'll have to construct a Still air box (SAB) to be able to inoculate the jars later on. SAB is just a huge container with two pluggable holes for hands.
You can take a look at some example builds of SABs if you follow those links:
Still Air Box design/prototyping/theory, TL SAB tek, and another Still Air Box build.
- Mark the holes.

- Cut the holes - with red-hot nail/awl for instance.

That was it! Here's what ready SAB looks like:
 | 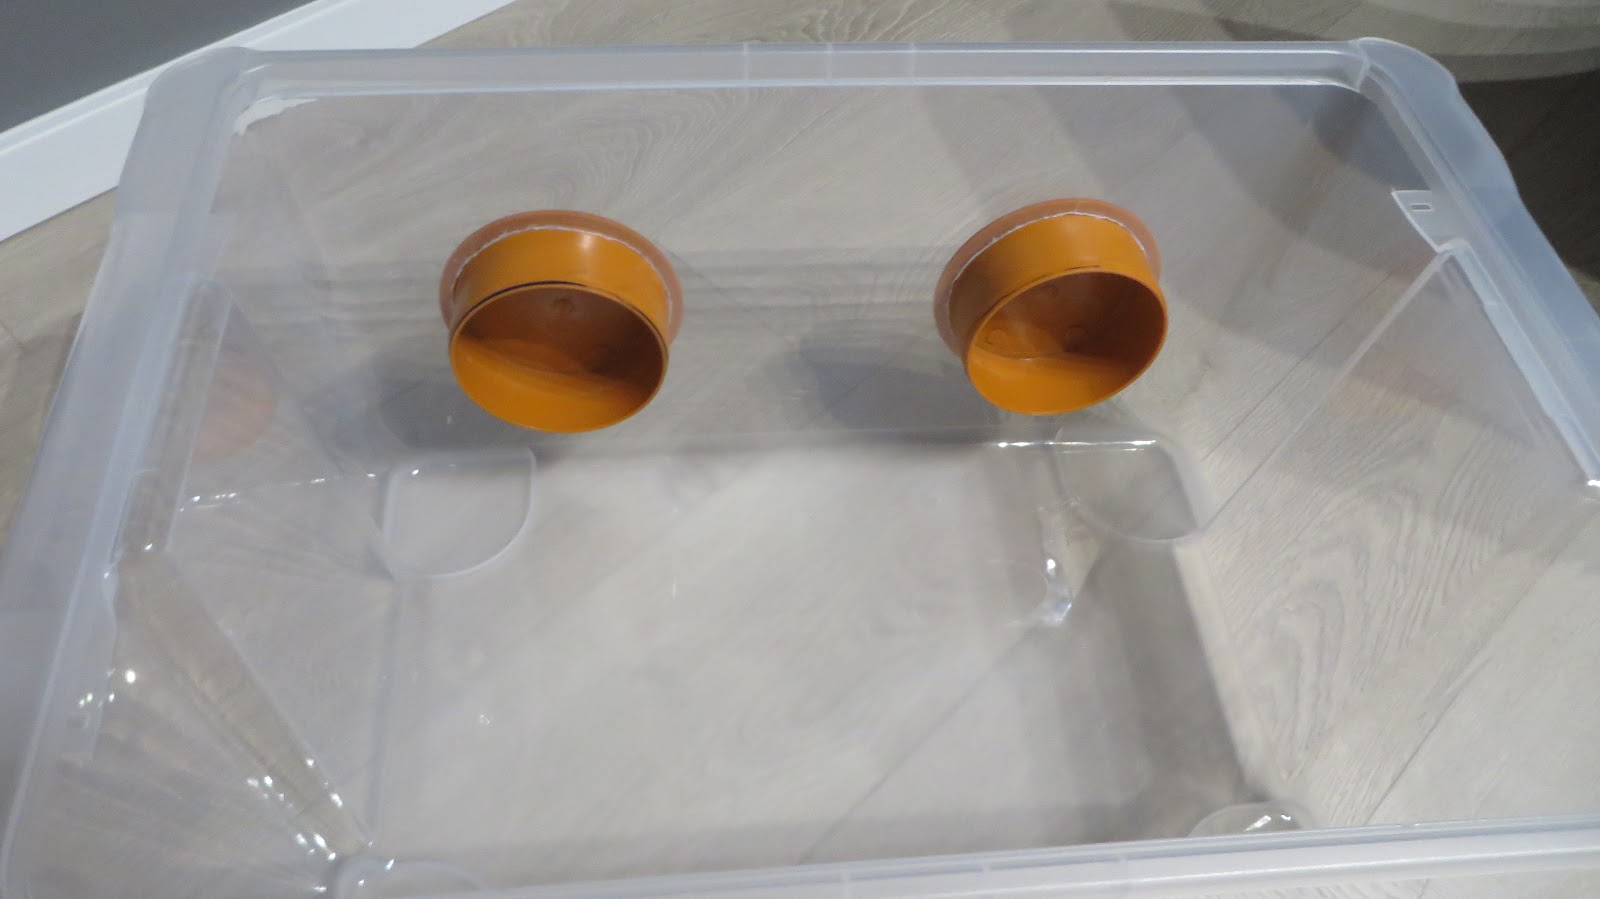 |
| Ready SAB with holes plugged. | Back view of the front wall - the caps fit snugly in place. |
Substrate preparation
* Variation 1. Brown rice flour + vermiculiteRefer to any of the PF-Tek links from the theory section, for example this one, in case something is not clear (e.g. proportions).
- Load enough grains to cover the blades. Grinders can't handle more than that really well.

- Grind the rice to a fine flour.

- Fill about half of the jar with vermiculite.

- Next step is mixing in water and rice flour. You can dump them into the same jar to make measuring easier, but I personally found that mixing process is easier to carry out in a bigger container:

Mix it all up until the substance is uniform. We want to aim for airy and well-hydrated substrate, so add more vermiculite/water if it looks too dry or clumpy.
 |
| Well-mixed BRF+vermiculite substrate. |
- Load the substrate into the jars. Leave some distance between jar mouth and substrate (the jar on pictures below is packed too tightly - should be twice as much free space left. Better leave too much empty space than pack it too tight). We're aiming to leave enough space for seedlings during inoculation stage - and then some more just to give mycelium room.

|

|
| BRF + vermiculite packed in the jar. Too tightly packed - aim to fill less than shown here. | |
- Close the jar, placing the synthetic cloth piece in between jar mouth and lid.

|

|
| Finished product. | |
* Variation 2. Coffee.

You don't need to prepare them, although supplementing them with sawdust would probably improve the quality. Adding vermiculite you obtained for the first substrate may also help if it looks too clumpy.
* Variation 3. Wild bird seed (WBS)
- Add bird seed into the jar so as to fill about half of it.

- Soak it overnight. You'll notice (even when you pour the water into the jar) most of the black sunflower seeds starting to float. Now, I've seen some teks suggest you should remove every one to the last of them from the substrate, but I didn't see any negative side-effect to leaving them in - they get colonized just fine.

|

|
| Before soaking. | After soaking. |
- The grain will swell and almost double in size after an overnight soak. What I did with black sunflower seeds was remove only the ones that were floating and could be disposed of by just effortlessly scooping through the top layer of water.

- Rinse the grain thoroughly under the strainer (collander) - there should not be any clumps and slime left.

- Pack it into the jar and close the lid, performing the same trick with the piece of cloth.

* Variation 4. Cardboard.
Weird enough, none of the cardboard teks mention any sterilization or pasterization. This is the reason I'm using just a plastic container to house mycelium-occupied cardboard pieces.
As to the reason why those simple precautions against airborne contaminants are omitted - it remains to be found out. I ran one experimental batch just to see who gets to colonize cardboard first: mushrooms or mold.
- Cut the cardboard to pieces that fit into the container.

- Soak them in water for about 20 minutes until cardboard easily comes apart when you pull it. Top and bottom layers are flat, with corrugated layer in the middle.

|

|
| Cardboard becomes more pliable after soaking. It separates into layers if you gently pry them apart. | |
- Out of those layers, we'll only need the corrugated one. Dump the pieces onto a surface. Now, since the pasterization/sterilization step is omitted, you can get straight to inoculation stage (with cardboard substrate only).

* Variation 5. Supplemented sawdust.
To compare the performance of supplemented vs plain sawdust, I'll show you how to prepare both kinds of sawdust substrate.
- Measure out enough sawdust to fill your jar about 1cm (1/2 in) under the top. Even less than that for supplemented substrate, because the additives have to go somewhere too.
 |
| This is the level we're aiming for. Make it lower for supplemented variant. |
- Fill the jar with water and leave the sawdust soak for 12h (or one night).

- Strain the water. If you're making plain sawdust substrate, jump straight to the canning step.Dump the moist sawdust into a bowl. Add your supplementation. You can't go wrong with the amount of flour, but I'd add about quarter to half of the sawdust volume.

- Mix it up thoroughly.

- Pack your jars with substrate, leaving about 1cm (1/2 in) at the top again. Don't tamp it down - it's got to have loose feeling to it.

- Close the jar with filter lid.

Sterilization/Pasteurization
Prerequisites: all your jars are loaded with substrate and closed.
- Put a tinfoil hat on each of the jars. This is to retain the moisture content of substrate during boiling.

- The jars should be raised above the bottom of the saucepan - this will ensure they won't crack. Devise some sort of spacer - as you can see, I just intertwined 3 forks to make a stable structure. Gives about 1cm of headspace.

- Heat the 'pan until it's close to boiling.

- Carefully lower the jars into the saucepan. Now you can bring it to simmering boil.

- Keep simmering under the lid for an hour.

- Turn the heat off and let the whole thing cool down for some time - if you yank the jars out straight away they might crack due to temperature difference.

There's not much to tell about two remaining boils - they're spaced 24 hours apart as well, and after the last boil you have your jars sterilized. Time to launch some beneficial life into them!
Inoculation
* Variations 1 to 3 and 5: Substrate in jars.I just prepared a short video to demonstrate how inoculation in a still air box works. This is one of the situations where one picture is worth a thousand words, that's why I made a POV style video of it. Things to keep in mind:
- Still air box is about stillness of the air inside. It's nigh impossible to create a really sterile environment, so we're building an isolated space where every live organism or spore floating in the air eventually swoops down and sticks to the wet box sides due to absence of up-going currents in the air. Be really gentle with the way you move your hands.
- It doesn't matter much what you wipe the walls with: soapy water, chlorine in water, disinfectant or alcohol. The point is to leave the surface slightly wet to trap the contaminants.
- Try to keep the time when the jar is opened to a minimum - just crack the lid, throw in mycelium and quickly close it. The less time it spends open the less the chance of contamination.
- It's entirely possible to inoculate jars with pieces of colonized cakes. I actually did that with sawdust-based substrates - by the time I decided to make some more jars with sawdust, my jar with wild bird seed was 100% colonized. When birthing the WBS jar, some colonized grain clumps naturally separated off of the cake and I simply gathered those, packed them into a ziplock and used it as inoculation material later, much in the same way I inoculated the jars with store-bought grain spawn.
- Break your grain spawn up into pieces into small pieces (inside SAB, of course! Watch the video). Don't separate it too much - 2-3 grains will colonize much slower than a bigger clump. I found that moderately-sized pieces about half the size of a peanut work best.
 |
| Circled in red is the size I usually use for inoculation. |
Make sure to wash your equipment after you're finished with inoculation.

Now that the jars are full of mycelium you can shake them to distribute the spawn evenly. Now it's time to put them away for a long time and give them time to grow through substrate.

* Variation 4: cardboard substrate.
Inoculation is done in open air (this is an experiment, remember?) and it's basically just laying layer after layer of corrugated pieces of cardboard while sprinkling some grain spawn in-between every now and then.
- You should've separated the cardboard into 3 layers in substrate preparation stage. Now you can discard all but the corrugated layer in the middle - it allows for better air exchange and gives enough space for mycelium to grow. Start laying the cardboard pieces in container while alternating patterns of corrugation for each consequent layer.
 |
| Horizontal stripes on the previous layer, vertical on that, and so on. |
- Drop a couple of pieces of grain spawn in some of the layers. Some of the pieces I have in the picture below are quite small - I recommend having 4-8 grains in one seedling.

- Fill about two thirds of the container and close it. Since this plastic container doesn't have anything for proper air exchange, open it up daily to let some fresh breath in. Because we did everything in open air from the start, it shouldn't affect the outcome.

Colonization/Incubation and Consolidation
 |
| Yep, that's what colonization looks like. Just jars standing in any room that's warm enough. |
I recorded a timelapse of colonization process with my action camera to see at a glance which substrate works best.
Wild bird seed was the fastest to colonize (2 weeks + 6 days of consolidation seemed enough to birth it), followed by Sawdust (20 days + 6 days of consolidation then birthing) and Brown rice flour (42 days to birthing).
I believe my BRF jar can't be considered representative of BRFs in general because I stuffed way too much substrate in that jar. Looking at the timelapse it's clear that after about 20 days the colonization process stalls and continues at a turtle's pace, however top layers proceed with consolidation. I had to birth the underdeveloped cake prematurely (who knew that happens to mushroom jars too, right?).
What about cardboard? This undertaking seemed dubious, but every day I still snapped a pic of cardboard with my compact camera. The result is predictable: eventually the growth process stalled and fungi occupied cardboard sheets. Myth busted: this idiotic approach could not work and it didn't. Maybe it had a chance if proper pasteurization (note that I'm not saying sterilization - cardboard is not that nutritious) techniques were followed?
Common pitfalls during colonization step:
- The colonization process started and some of the jar contents whitened, but the process slowed down and halted eventually.
A) Substrate has dried up.
What do I do now? Well, adjust the water content for future substrates.
Is there anything I can do with the jar? Yes, but the probability of success will drop substantially. Boil some water and let it cool to room temperature. Then slowly pour it on top of the jar so that it seeps through your air filter and inside the jar. If you're lucky and you didn't bring in too much contaminants, you'll observe the colonization commence again.
B) Substrate lacks certain nutrients.
What do I do now? Think about what this substrate lacked (for instance, coffee ground are rich in nitrogen but that's pretty much it. Can't grow mushrooms on pure nitrogen).
Is there anything I can do with the jar? Throw it away.
- I'm seeing green/blue growth or sporadic white spots
 |
| Some unfriendly growth in one of my jars. |
Is there anything you can do to save a contaminated jar? Depends on how far underway is colonization process. Think how ready jar contents are for dumping and fruiting.
If it's almost colonized and there's just a few spots of mold, mycelium may actually take over. Or, if it does not, you can always birth that jar and cut off the infected part.
For substrates that are not even remotely ready for birthing, open up the jar and dispose of the substrate, then wash the jar thoroughly.
In preparation for fruiting.
While colonization is underway, you could occupy yourself with leisurely paced preparation for what comes after: birthing the cakes and fruiting.To let fungi develop the fruiting body, we'll have to emulate the environment of the forest when the weather is prime for fruiting as close as possible. Here's what this boils down to:
- High humidity - really damp, something approaching 80-100% RH will work for most species.
- Warm temperatures. Room temp is fine, but if you have to fruit outside in the winter you'll have to come up with a heating system of some sort.
- Indirect dim light. There's just a tiny amount of light coming down from the thick canopies above in forests, but it's still there. Complete dark is not desirable, just like intensive head-on lighting isn't.
The simplest and the most effective fruiting chamber people usually build is a shotgun fruiting chamber, which is simply a huge transparent container with holes in it sitting somewhere with not too much light.
What I decided to try out was to make a similar chamber out of an opaque container. My expectation was that the holes will provide all the necessary dim light to mushrooms inside. I'll have to expose the chamber to bright light for this to be possible, instead of finding a spot with dim light for a transparent chamber in my apartment.
Here's the recipe for my opaque shotgun fruiting chamber:
- Grab any opaque container big enough to house your cakes. I grabbed two 10-liter buckets left over from construction works nearby. You'll also need a drill fitted with bit any size from 4 mm. to 10 mm. (5/32 in. to 13/32 in.).

- Start drilling holes on every side except bottom. You can follow any fancy pattern you wish or just drill holes randomly.
- You also want to keep about 2-3cm (1in) from bottom hole-free as you'll be pouring moisture - retaining material there.
 |
 |
| Inside view. | Outside view. |
- Drilling a plastic bucket will leave hole edges jagged. Shave them away with something sharp. Personally, an ordinary kitchen knife did the job for me.

- Having tried this build of fruiting chamber, I've found one critical deficiency: no drainage holes means that inevitably some water will stay still at the bottom, go stale and attract all sorts of unwanted insects and mold. So the last step would be to pierce small holes in the bottom of the chamber. Hole should be as big as possible but not let any bottom-covering material (perlite, vermiculite) out. This will take care of drainage, much in the same way like in a flower pot.

Ordinary needle heated with lighter flame did the trick for me. - Use the lid of the bucket as a coaster - water will drain there. Cover the top of the bucket with a piece of transparent plastic.

Fruiting chamber ready to use! You can cut plastic to size in yours.


Birthing the cakes.
That's it. You waited for a whole extra week after the jar was colonized and now it's time to birth it. I got bad news for you: if you want a sure-fire fruiting, you might also want to try and introduce some pinning triggers to the mycelium you're about to take out.What's a pinning trigger? It's as simple as something that tells mycelium that it's time to fruit. One trigger that all mushrooms share is cold. Prolonged stay in cold temperatures gives mushroom a hint: "Hey, winter is coming, so it's now or never!". Overnight stay in the fridge is usually enough to imitate this trigger:

Again, reading about specific triggers for you mushroom is a good idea too. The trigger that's specific to shiitakes, for example, is striking the substrate. You can read more about it here, but in essence this tells mycelium (that grows on dead wood in nature) that the log has fallen. Of course, we grow on softer substrates and there's no way we could strike the jar with a hammer, but slapping it may help trigger pinning.
Ok, so you've got everything prepared for birthing by now: you built your fruiting chamber, froze and slapped the substrate jar silly, bought a spray bottle and filled it with clear water.
Most growing teks suggest you fill the bottom of the fruiting chamber with perlite: it will retain the moisture and maintain high humidity. Perlite turned out to be unobtainium in my city, and I did not have time to wait for an online order to come in. Personally, I found that replacing it with vermiculite works well enough: vermiculite is also good at holding water and gradually evaporating it.

Common instructions for birthing applicable to all substrates:
- Open the jar:

- We're going to dunk the substrate now. Get a container - an ordinary cooking bowl works - that's at least as deep as your substrate jar, but wider. Gently slide the contents of the jar into it. It's nigh impossible to get it out without smacking the jar on the bottom.

|

|
| Tiny crumbs of colonized substrate will inevitably stay inside. You may be tempted to gather it and store to inoculate with it later, but that's unlikely to work - they'd already been exposed to the "dirty" atmosphere. | |
 |
| Colonized substrate in a bowl. |
- Pour cold water in the bowl up to the top of the cake. Weigh it down with a heavy item, otherwise the cake will float.

- Wait for 24 hours. Now the cake's restored the moisture contents and can be put into the fruiting chamber.
 |
| Dunked cake. |
- Fill the bucket/fruiting chamber about 1cm(1/2 inch) deep with vermiculite or perlite.
- Pour some water into the bucket. We're aiming for a level such as when inclining the bucket slightly you'll see little water coming out of the vermiculite/perlite.
- Simply place the cake into the fruiting chamber.
 |
| Cake on a coaster. |
I advice housing your cakes on coasters: anything that can serve as a separator between cake and perlite/vermiculite. Without it mycelium will attempt to colonize the whole bottom layer of your fruiting chamber!
 |
| Mycelium ingrowth after a couple of days of freely standing on vermiculite. |
This is all there is to birthing the jars, really. Sounds sophisticated but it's as simple as dumping the contents of a jar into the fruiting chamber.
Information specific to tightly packed jars.
This is what happens when substrate was tamped down too much. After 40 days of colonization I decided I'll birth this jar prematurely - it looked like there was no room at all for mycelium to grow.

|

|
| If you look closely, you'll notice fruiting body pressing itself against the glass in attempt to grow here. | |
My theory was confirmed when I popped open the jar. There was so little space that mycelium deemed it easier to climb up through the cloth rather than try and go down.

|

|
There's nothing unusual you have to do to birth jars like this one, I just wanted to leave it there for people curious what it will look like. Also as a precaution, obviously.
Information specific to coffee ground substrate:
Coffee grounds was another substrate that didn't live up to my expectations. I'm not sure what's to blame for shiitake refusing to grow on coffee: the fact that coffee grounds is not good enough for wood-dwelling shiitakes or maybe even total unsuitability of coffee for mushroom growing business.
I'll have to try growing something simpler on coffee grounds.
Anyway, here's what coffee jar looked like when I opened it 40 days after inoculation:

|

|
Top layer (about 1/3) was barren and dried, but under that there were clumps of colonized grounds! About half of the volume of the jar was filled with those clumps, actually:

|

|
Having taken them out carefully, I thought I'll give open air inoculation a try. When half of the jar is already filled with mushroom, occupation of the other half should be faster than mould taking a foothold in there. So I've filled the same jar with colonized lumps of coffee, careful not to break them up, and topped it with pure sawdust. We'll see how colonization of this one goes.

UPDATE 2019-05-15: Decided to open the jar. Due to the fact that I've been using wet sawdust from the forest, contents of the jar now smell like decomposing forest floor leaves. Threw it all away.
UPDATE 2019-05-06: Still no signs of any growth in this jar, benevolent or otherwise, almost 2 months in. Continuing my observations.
Fruiting
This is the part that requires most repetitive and cyclic work. To keep fresh air abundant in fruiting chamber and relative humidity as close to 100% as possible, 3 or 4 times daily you'll want to:- Open up the chamber

- Spray the insides of it, careful not to drown the cakes.

After each spraying the walls should be as wet as possible - think rainforest.

- Fan the insides of the chamber with something - I'm fanning it with bucket lid.
Aside from that, nothing specific - keep an eye out for the mold and cut it off if it appears on your cakes. Now that I've mentioned that, remember that tightly packed BRF jar I had to birth prematurely? That uncolonized portion of the cake at the bottom is the one that's most predisposed toward mildew.
 |
| That part that mycelium couldn't occupy soon enough got ridden with a pocket of mildew after a week. Had to cut it away. |
Notes on trying to fruit Wild bird seed cake:
Because WBS cake took only 2 weeks to colonize, I was anticipating fast first flush from that one. No dice - it just sat there and browned (this is a sign of ageing in Shiitake mycelium).

After a month of waiting for something to happen, I had to face it: either Shiitake will only grow on wood or there's something wrong with my fruiting chamber. Since every source on Shiitake mushrooms will point at the fact that it is, indeed, a wood-loving species, I accepted the first explanation more readily.
 |
 |
| Heavily aged WBS cake after a month in fruiting chamber. Plus spots of mildew as a gift :) | |
I didn't want to let the whole cake go to waste, and thought of something I could do to make use of the old cake: inoculate other substrates with it! (Caution - this is an ongoing experiment. I've yet to actually inoculate substrates with these dried cake pieces. Let me know if you did that and what was the outcome).
- Cut away every infected piece of mycelium, if there are any.

- Dice the cake to whatever shape you like, as long as it's easy to store.

- Store in a plastic zip-lock bag, but dry them completely in open air beforehand to avoid mold infestation.
Grow Log
Brown rice flour (BRF) cakeInoculation date: 2019-02-05
Birth date: 2019-03-17
 |
| BRF cake, 8 days into fruiting. |
2019-04-08: After birthing the cake, it just sat in the chamber and aged (browned). After a month of stagnation I decided to do something about it - fruiting should've taken 2 weeks at the most!
1) The surface of the cake felt dry to the touch at times, and I figured that too much humidity was lost through the holes, so I taped some of them with an ordinary scotch tape.

2) To further increase water content in both cakes (BRF and supplemented sawdust) I dunked them for 24 hours and rolled in vermiculite again.

This seemed to have the desired effect! First mushroom started sprouting on 2019-04-14.
 |
| Appearance of fruiting body: day 1 (14th Apr). |
 |
| Day 2. |
 |
| Day 3 (16th Apr). |
 |
| Day 4. |
 |
| Day 5 (18th Apr). |
First mushroom harvested: 2019-04-19
I tried to rehydrate the cake that delivered my first homegrown Shiitake by cutting off the crust before dunking (24h.) and rolling it in vermiculite, but that did not seem to work - the whole cake just developed mold in a couple of days after I dropped it back to the fruiting chamber. Still, that could've worked so I'll recommend trying that too before throwing the cake away.
Wild bird seed (WBS) cake
|

|

|

|
|

|
I tried to rehydrate the cake that delivered my first homegrown Shiitake by cutting off the crust before dunking (24h.) and rolling it in vermiculite, but that did not seem to work - the whole cake just developed mold in a couple of days after I dropped it back to the fruiting chamber. Still, that could've worked so I'll recommend trying that too before throwing the cake away.

|

|
| Peeling the crust and revealing the white mycelium within. | |
 |
| Freshly peeled cake after additional dunking and rolling. |
Inoculation date: 2019-02-05
Birth date: 2019-02-25
Stopped growing them and chopped for inoculation material on: 2019-03-24
Coffee grounds
Inoculation date: 2019-02-05
Opened the jar and inoculated sawdust with clumps of colonized coffee on: 2019-03-18
Sawdust cakes
All either dried out or spoiled. Sawdust needs additives that will store the water uniformly around the substrate. With pure sawdust it tended to just pool at the bottom.
One exception from this rule was one jar that neither sprouted mold nor mushroom mycelium: it had high water content, and mushroom started expanding from one spot inside, then the growth stopped to a crawl and finally it somehow shrank back! I'm attributing this to the fact that the environment wasn't contaminated, but didn't contain enough nutrition.
Supplemented sawdust cakes (only one survived to birthing phase)
Inoculation date: 2019-02-25
Birth date of the first one: 2019-03-19
 |
| Supplemented sawdust cake, fresh out of the jar |

This crust felt tough and dry to the touch, and eventually I had to throw this cake away. I suspect the reason for that crust appearing was low humidity, as the other cake that has been fruiting at the same chamber at the time also developed the same kind of protective brown skin.
Lessons learned
1) It really is important not to tamp down the substrate when packing it into the jar. The airier the substrate, the faster it will be colonized. I really over-compacted BRF substrate and it's clearly visible in colonization timelapse that it took forever to colonize, especially the bottom layers.2) Shiitake mushrooms will readily and quickly colonize Wild bird seed, but don't actually fruit on pure WBS cakes. Therefore WBS should be used as a way to quickly get spawn grain for further colonization.
3) Open air inoculation techniques are tricky to master (or they don't work at all). Beware of teks that include them. I'll definitely try growing on cardboard again: basic mushrooms like white button (Agaricus bisporus) might work.
4) Cardboard-grown mushroom should not be considered edible: cardboard is not just wood pulp, factories supplement it with a heap of additives, aside from glueing together the corrugated layers and printing on top of it.
5) Pure sawdust is awful at retaining moisture - almost all of my non-supplemented cakes either dried out or bloomed with mold. In one case where it was neither, mycelium started growing and collapsed - looks like you can't sustain mycelium with only cellulose! I'll try combining BRF substrate (vermiculite holds water, rice flour adds nutritional value) with sawdust going forward - theoretically it should be the best jar substrate for wood-loving shrooms.
6) Pure coffee grounds can't sustain shiitake mycelium. I'll definitely attempt to utilize coffee again - maybe white buttons or oysters (Pleurotus genus mushrooms) will take a liking to ground coffee, unlike Shiitake?
Although my newly-acquired mushroom growing experience tells me that this is not about incompatibility of gourmet mushrooms and coffee grounds: I have to agree with this article on that matter. It concisely describes the problems of growing on coffee. My conclusion: coffee grounds should be used as a supplementation to increase nitrogen content in substrates (for instance, these guys say that sawdust has to be supplemented with nitrogen to make a good substrate)
7) Optimal diameter for a hole in the jar top seems to be around 1 cm. (1/2 in.) or even smaller.
My first attempts at piercing lids always yielded small holes, but then I thought I'd experiment with bigger diameters - to provide access to even more air for mycelium. Unfortunately no matter what substrate, bigger holes are also an escape route for evaporating moisture, and most of the jars with big holes in lids dry up prematurely.

8) Rolling the cake in vermiculite is an important part of the famous "Dunk&roll" process. I just dunked without rolling on my first batches and they did not fruit at all. Dunking them, peeling the crust off and rolling seemed to do the trick.
9) I've yet to discover if using perlite for fruiting chamber will increase the yield as opposed to vermiculite.
Amazing work
ReplyDeleteWow! Very interesting, keep it going experimenting!
ReplyDeleteThe presentation has so much interesting information I didn’t know. Very well-written article, I appreciate you sharing your knowledge.
ReplyDelete