- Get link
- X
- Other Apps

 |
| Courtesy of Hackster.io. |
As time goes on, new possibilities of creating cool devices seem to endlessly pour on my head. This time I was invited to take part in Eurobot 2018 national qualifications to compete for the chance of going to the international grand finale. Aside from the obvious task of building power distribution and control circuits for the robot and programming it, I was also responsible for making a device that dynamically displayed the number of points that the robot earned in the match.
While the robot's electronic entrails were arguably the most enjoyable part of my contribution to our team, I'll publish the details of making the displaying device anyway.
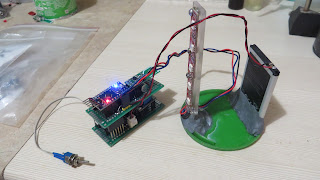
But first, I'll diverge a little with just a few pictures of our robot's electronics (a team participates with two robots - and those are for the small one):

|

|

| |

Now let's get back to the display.
Product specification
According to section D8 in the official rules, team may either paint some kind of static rough estimation of their score in this round on a board, or produce a dynamic display device for that purpose:
I'm going to show how YOU can make a display like mine out of Arduino and those widespread WS2811 RGB LEDs below:
Components
For the display itself you're going to need:- An ordinary PC fan and a plastic top from any jar. Any disc of plastic will do.

- Five WS2811 individually addressable RGB LEDs. I got mine online (aliexpress).

- Hall sensor (ali) and a magnet to synchronize LED blinks to platform rotation.

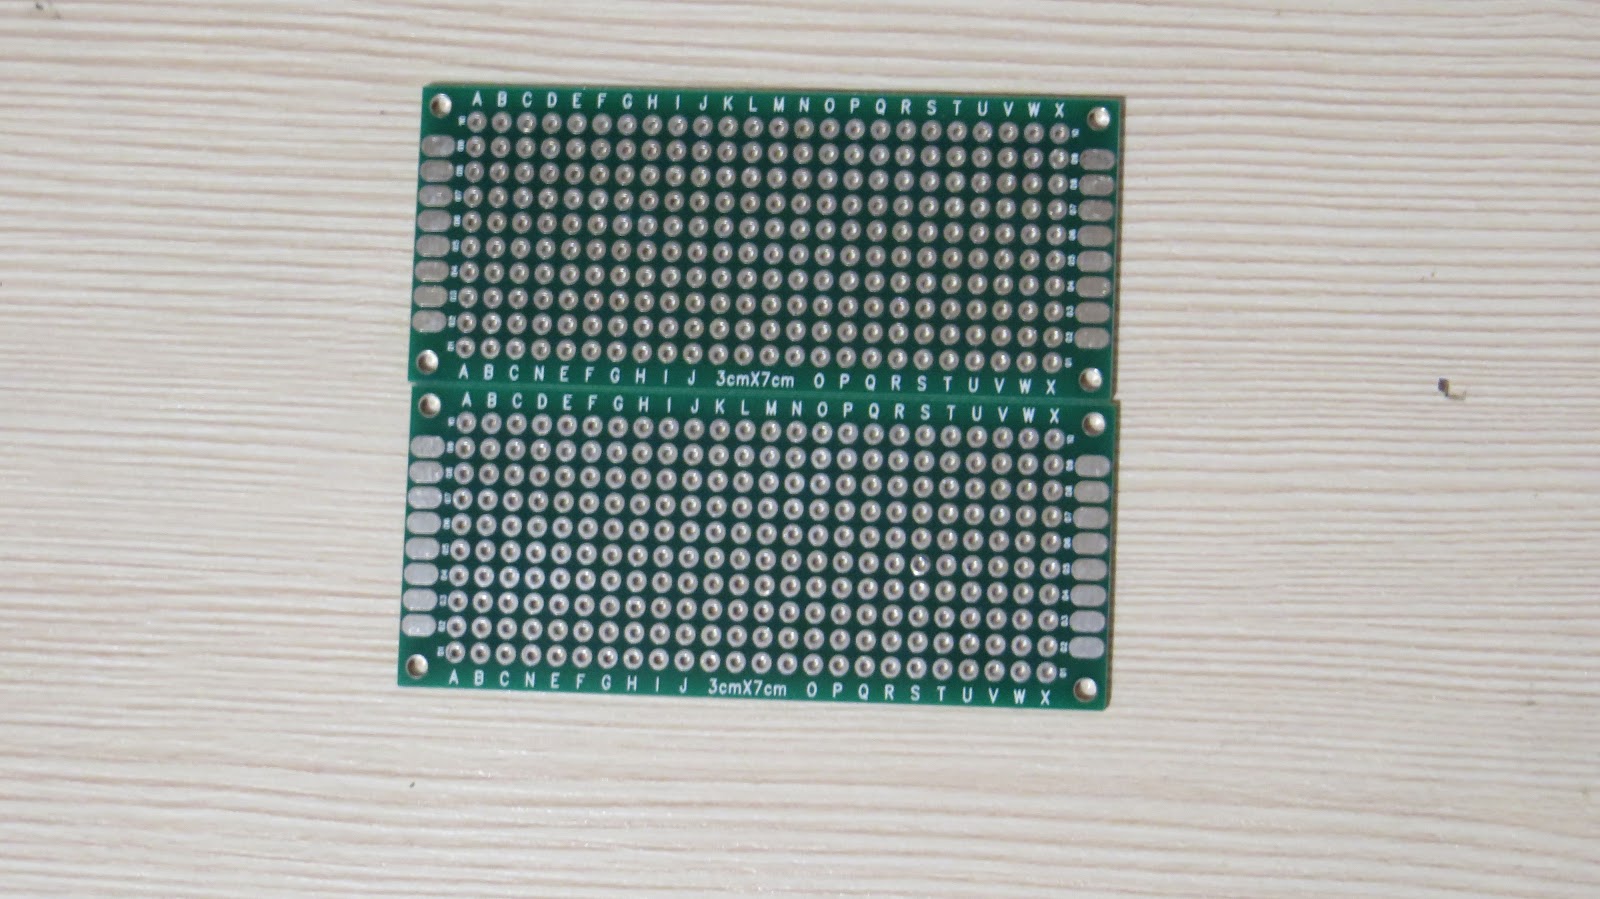
- Two 3x7cm perforated boards (ali again. Yeah, you got me, I like to order
junkuseful components from this store). Actually, maximal allowed size will depend on the size of your fan, but it all fit snugly on two boards of this size, so I still recommend those. Also, you'll need something to fix one perfboard on top of another - I had some spare Arduino-style pin headers, but it's OK if you don't have one - you can connect the boards with four long bolts or stadoffs.

- One lithium battery of any capacity that'll fit on top of the fan (rip it out of some unfortunate old cellphone about to be thrown into the trash. Everyone got one of those, ask your friends and family), one charger for the battery

- One boost converter (battery voltage -> 5V. This is mine, but maybe try this one? It looks more compact in vertical dimension), one buck-boost converter (battery voltage -> 3.3V. These are dirt cheap.), and a power switch. UPDATE 26 Apr. 2018: using the converter to power the RF transceiver was causing instability problems (because of mad spikes the cheap converter was putting out, I presume). You'll be better off getting an 3.0V LDO regulator in its place.

- One 3.3V Arduino (that's important to avoid level-shifting circuitry!) and one NRF24L01 RF transceiver.

For score transmitter:
- Another NRF24L01 RF transceiver
and any Arduino with USB port to set the score from PC. I only had 5V
Arduino boards with USB, so that's what I had to use - my pick is Arduino Nano clone. 5V microcontroller won't fry the RF module, provided you power it from separate 3.3V power source. NRF24L01 data lines are 5V-tolerant. My 3.3V power source was LM1117-3.3 regulator - the beefier the better! No heatsink required.
You'll be better off getting yourself an USB-connected 3.3V Arduino Pro Micro, though you'll still have to feed NRF24L01 off the separate 3.3V regulator - the stock regulator on most Arduino boards is only designed to power microcontroller itself and periphery with insignificant current consumption.

Assembly
We'll start by making the rotating platform itself, a device conforming to the schematic below (remember, use 3.0V LDO regulator as U4 instead of buck-boost converter): |
| PDF version |
- LED strip composition.

Take a length of solid core wire, strip the insulation.

Start soldering the wire to WS2811 modules, one...

..by one.

Then, solder opposite ends of wires to another WS2811, so that they are connected head to tail (IN to OUT).

Keep the wire between LEDs short, but not too short. It should be as long as to allow modules to align to a single plank, not a smidge longer.

Rinse and repeat until you get a stipe of required length (5 in my case, enough to show numbers).

Now we have to install the stripe of LEDs at a right angle to the spinning platform.

Not having access to laser cutter, I clumsily cut the panel for LEDs out of acrylic sheet.

Then mounted and soldered the connector on to it. That's the result here.

Time to mount the strip on to the base! For simplicity's sake, I attached it with 2-part epoxy putty (a.k.a. cold weld).

The other bulky part of the electronics that my device incorporates is lithium battery. Slap it down with some epoxy as well! - Soldering the circuit board(s).

First, let's arrange the components on perfboards. Having sockets for each module will diminish your pain if you manage to destroy one of the parts - in fact, I accidentally applied reverse voltage to Lithium charger's microUSB connector(well, what do you know...), and charger replacement took no more than a minute. 
I had a couple of Arduino-style headers in my drawer, and they double as power connectors between top and bottom boards in this application - neat!

Once everything's seems to be in its right place, solder it down.


My bottom board holds the power-related circuit parts. Battery will be connected to the white JST-style connector at the far side of the board. Connect everything according to schematics....

... and set up your dc-dc converters so that they output the right voltage.


Now that the bottom power-routing board is ready, you can get to the top board. It should contain all controlling peripherals. You can use Arduino-style connectors to transfer power. Don't forget to route 3 wires for hall sensor to the side of the board.

Insert Arduino and NRF24L01 in place and the circuit is almost ready! - Testing and post-assembly.
At this point you should be able to push the battery connector into position and behold the marvelously working circuit. Doesn't make sense to go farther if you see puffs of smoke, or if some overheated part burns your skin.

Add four standoffs. Makes for easier board to platform attachment.

I had to carve pieces from my platform to make board fit on top of it.

Then I just glued it all together - the fan's propeller, the platform and my board on standoffs.

Where do you cram the power switch in such a space-constrained build? Drill a hole in the top PCB and plug it there. 
Now, the icing on the metaphorical cake of this assembly would be the hall sensor. Install it and you're done with hardware part of this device.
-
Another device to set the message via RF channel. Bet you forgot about it already! This device will be a minimalist way to connect NRF24L01 to PC.

Board to chip connectors for radio transceiver or microcontroller seemed unnecessary for such a tiny device, hence the wires soldered directly to pins and terminals. Also, deadbug-style capacitors piled on regulator legs.

This thing is going to be dragged around. A lot. Think about the enclosure - you can print one tailored to the electronics, or just grab an empty one from old daylight lamp ballast like I did.

Soldering this takes maybe 15 minutes tops. Flexibility goes to hell, but think about time saved!😃

Screw the board with USB to the enclosure for added ruggedness...

...and close the lid! You're done.


Programming
Pro micro can be programmed with USB-TTL Serial convertor (e.g. FT232RL based) - you just hook the convertor's pins directly to the Pro mini and you're all set to upload your code. Unfortunately, I haven't had one at the moment so I used another Arduino to program this one😊:
|

|
| Connections for programming, on Pro Mini and Uno respectively. | |

First sketch that I uploaded was a simple stock example for NeoPixelBus library, just to check that the most important part of device, RGB LEDs that is, is working all right:
That display of colors sure was beautiful, but did it really check the display for dead pixels? Judging by the video, all the pixels are in perfectly working order, now let's upload this another sketch and see again:
That's how, after hours of puzzling over why isn't my code working, I finally got around to replacing the topmost neopixel. Testing your pixels with this code really should be the first thing you do, this will save you loads of time.
Some hall sensors will detect your magnet (depending on its size or, more accurately, magnetic field) from an inch, some will require you practically flatten the magnet against the sensor's face. Therefore, after testing your LEDs it only makes sense to test if the magnet you chose triggers the hall sensor in your setup. This sample code contains Bounce2 library, and you'll need it for the final sketch as well:
Depending on the diameter of your fan, you'll have a certain usable width. To get the sense of how many virtual pixels you can fit on your virtual cylinder-shaped display, upload this sketch:
Even though the video doesn't really capture this, this code will start by showing just one vertical stripe of red color, and continues adding rainbow-colored stripes every second. Once the newcoming stripes overlap with the first one, your display's reached the limit. That's how I found out that my display is about 20 by 5 pixels.
What I did then was displaying some numbers. To be frank, I didn't do any calculations and was worried that Neopixels' bitbang protocol speed might be insufficient for POV effect. Here's the sketch:
The only thing left neglected in our build now is radio. Soo, last but not least comes NRF24L01 check. I've prepared two sketches - one for receiver and another one for transmitter - to check radio operability. The library we'll be using is the most popular one - RF24 by TMRh20. Despite its popularity, examples in this library don't seem to look beginner-friendly, so use mine if stock code look baffling:
Enough of your dumb testing, just give me the code!

- PC app (github)
-
This sketch for POV platform will display all numbers spread across the full range of colors, with each consequent layer closer to violet and farther from red.
-
This sketch for POV platform shows each digit in one color, as some suggested it improves readability.
-
This sketch should be uploaded to the command sender thingy.
Comments
Post a Comment