- Get link
- Other Apps
На русском
This post I'm writing today will deal with tankless gas heaters. Not just any heaters, but the ones that are battery powered, such as this one:
As you can see on the right corner of this picture, a portable tankless gas heater uses two D-type batteries to ignite gas and keep the water valve open. Compared to more commonly sold mains-powered units, this one has an advantage of being able to heat water during power outage. There's one disadvantage, though: depending on how often you use it, you'll have to replace batteries sometimes as often as every 2 or 3 months! Being a lazy bum just as I am, one day I decided to overcome this disadvantage and make my heater work from mains, retaining the advantage of autonomy from power grid. How?
Today I will show you how to make your tankless gas water heater autonomous from mains electricity (that is, it will work even during power outages).
Pros: you won't have to constantly change batteries.
Cons: none! What are we waiting for, let's get started!

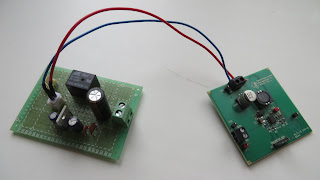
 Here's what you'll need to assemble a thing like that (you can get it all from your local electric/electronics store or from China, the choice is yours):


This post I'm writing today will deal with tankless gas heaters. Not just any heaters, but the ones that are battery powered, such as this one:
 |
| Typical battery-powered tankless gas heater, bottom view. |
As you can see on the right corner of this picture, a portable tankless gas heater uses two D-type batteries to ignite gas and keep the water valve open. Compared to more commonly sold mains-powered units, this one has an advantage of being able to heat water during power outage. There's one disadvantage, though: depending on how often you use it, you'll have to replace batteries sometimes as often as every 2 or 3 months! Being a lazy bum just as I am, one day I decided to overcome this disadvantage and make my heater work from mains, retaining the advantage of autonomy from power grid. How?
Today I will show you how to make your tankless gas water heater autonomous from mains electricity (that is, it will work even during power outages).
Pros: you won't have to constantly change batteries.
Cons: none! What are we waiting for, let's get started!
Our "patient"
Given:- old tankless gas heater powered by two D-type batteries like those:
- your adept hands.
Gas heater modifications
Since I live in a rented apartment, I did not want to modify the heater in any visible or irreversible way. Bearing that in mind, all improvements I made were minimally invasive. That's what you'll need to do:- Buy two D to AA adapters from China:
- Craft two fake batteries from two pieces of wire and battery adapters. They will supply power to internal circuitry instead of conventional batteries. To make them, solder a wire to the backside of + and - contacts inside the adapter like this:
 That's what this trick is supposed to yield:


- Plug the modified adapters into the battery compartment. The output of our uninterruptible power supply will be connected to them, eventually.


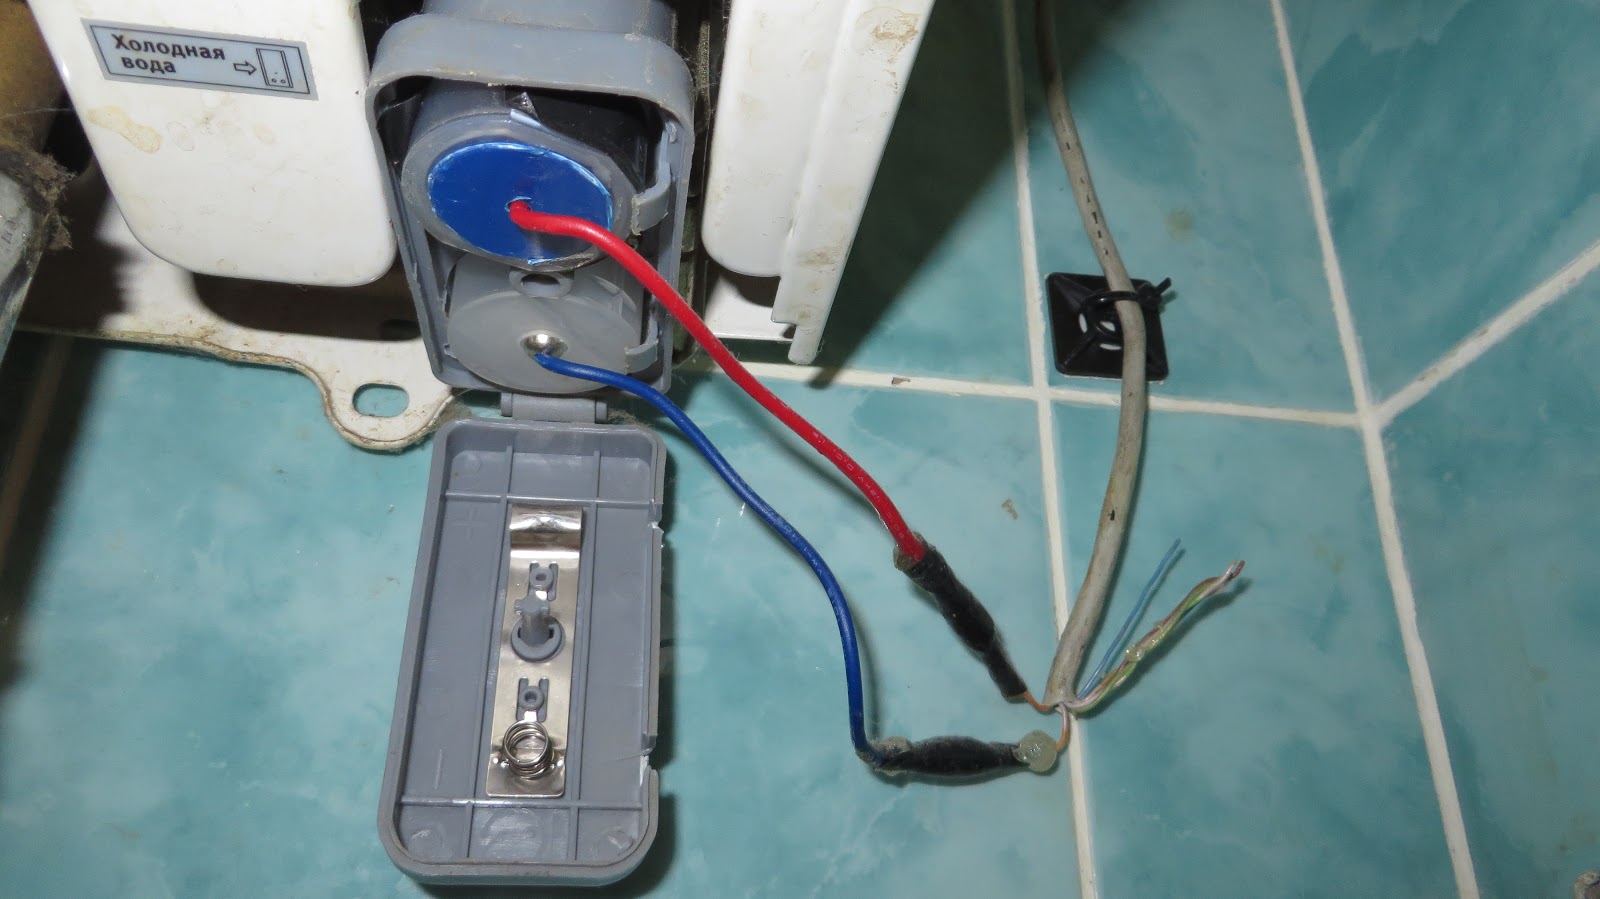
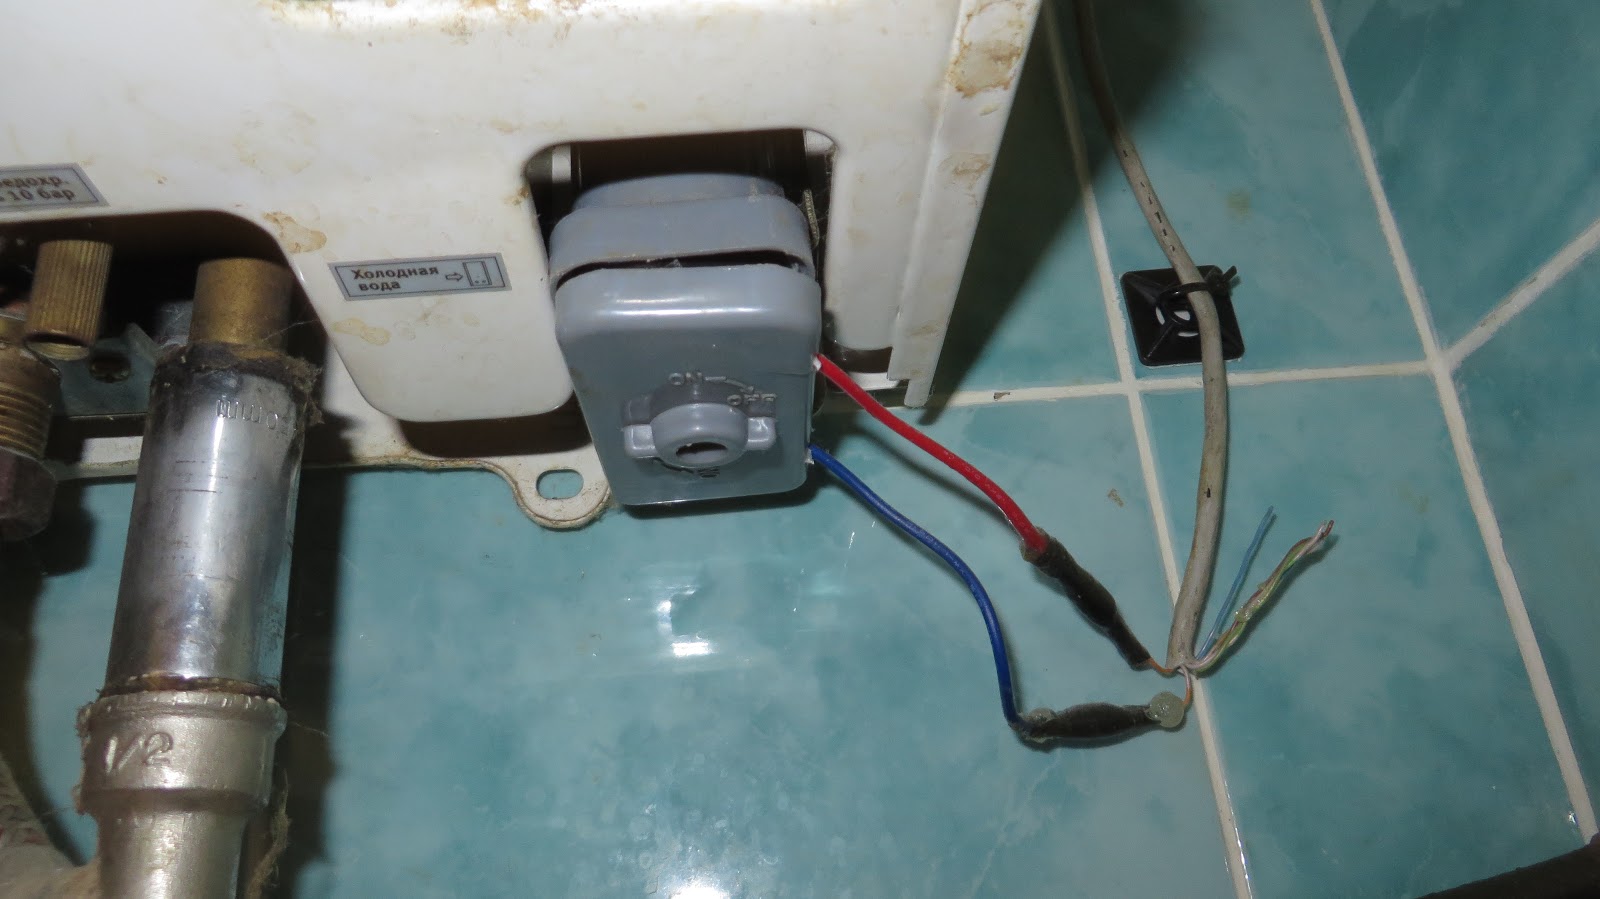
- Stretch the wire from some dry corner where you'll plant your electronics to the gas heater. I used a twisted pair, and I advise you do the same to avoid crosstalk.
- Connect the adapters with the twisted pair. This connection will be splashed on, that's why I connected the wires submarine-style: smeared some epoxy resin there the wires were twisted together and applied a heat shrink on top while it was drying out. That's the easiest way I found to get a waterproof connection.


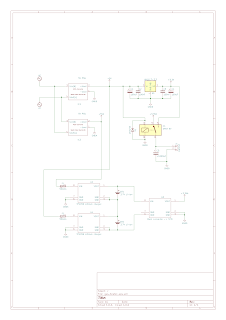
Schematic and assembly
The schematic is quite simple (as every schematic I made, ever 😀). For the main power source I used an 1117 3.3V voltage regulator, and 2 cellphone batteries wired in series for backup. There batteries are charged from two 5V PSUs, and buck converter converts their combined voltage to 3.3V.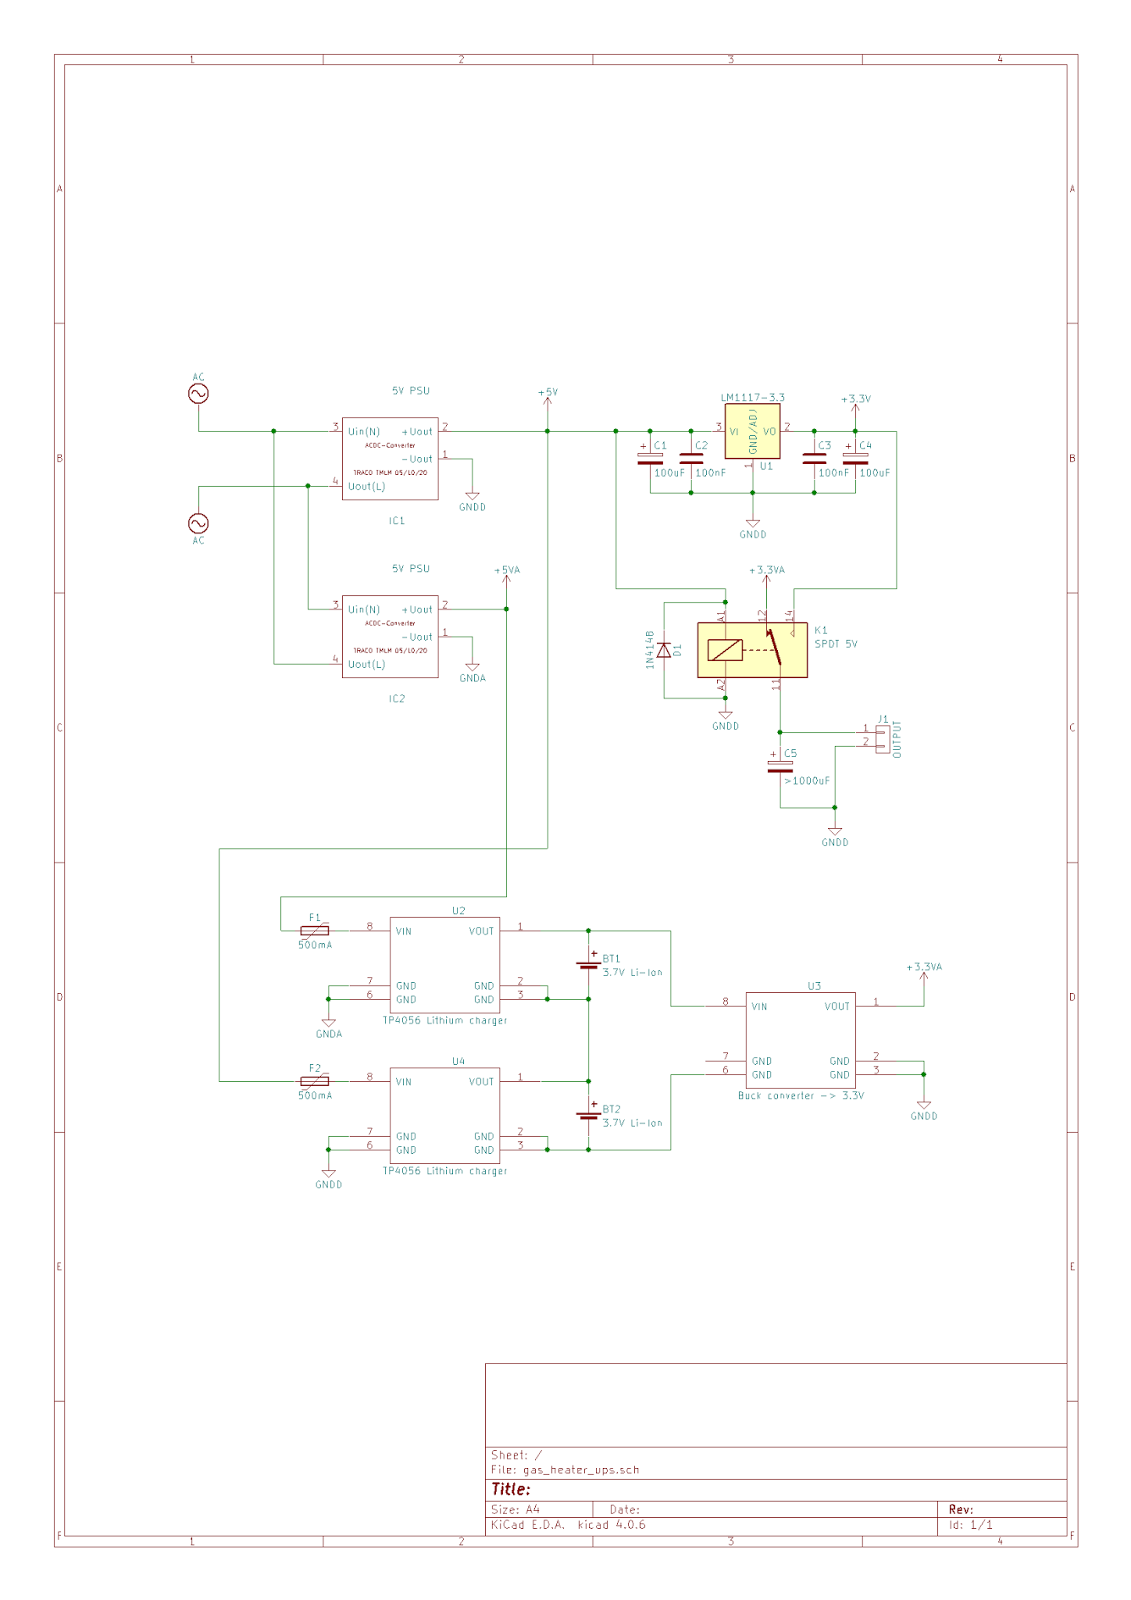
- For AC part of the schematic (left to right, top to bottom) - AC switch, two PG9 cable glands, two Wago connectors (222 series, 2 holes), four quick disconnect crimp terminals, 0.5A fuse and fuse holder. You can find some of it in electric supply stores, some in electronics stores.

- For DC part - LM1117-3.3 voltage regulator, PCB mount screw terminal, two PTC fuses rated 0.5A, SPDT relay with 5V coil, perfboard, two 5V power supply units (can be yanked out of USB chargers).

- For backup part: electrolytic capacitor rated at least 6.3V with capacity >1000uF, two lithium charger boards (mine are based on TP4056), two cellphone batteries (that's what I used because I had those lying around, but if you're ordering them online or buying offline, why not get yourself some regular 18650 lithium batteries instead?), buck DC-DC converter with 3.3V and at least 1A output.

- A project box where you'll cram all stuff I mentioned above.
- All sorts of electronic trifles like electrolytic and ceramic capacitors, wire-to-board connectors etc...
 |
| Everything you'll require in one picture for completeness' sake. |
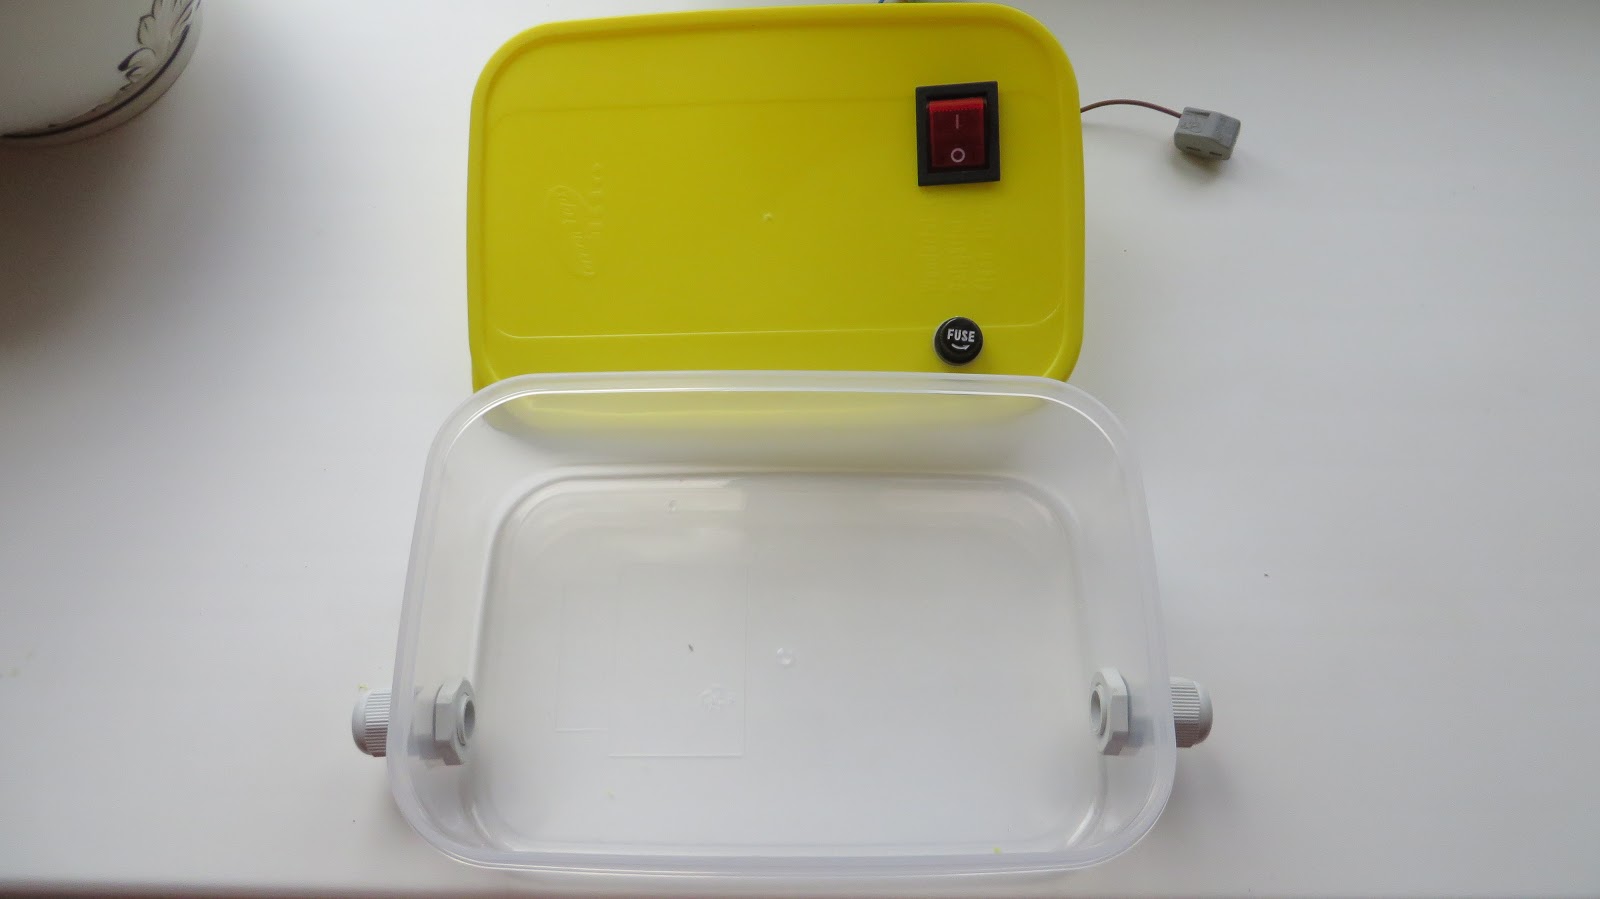
- Cut and/or drill apertures in the box for cable glands, switch and fuse holder. Mount them all. To make those holes, I found conical drill bit and very sharp hobby knife handy.

- Connect Wago 222 to power switch. Mains voltage is to be connected to them - the ability to simply join the wires with your bare hands will come in handy when you'll be installing this box to some remote dusty corner. No crimping, screwing, etc...

- Let's prepare the batteries. They can be conveniently arranged as two modules consisting of battery + charging circuit + PTC fuse:

- If your
batteries, like mine, came with spring-loaded contacts, you can try to avoid making them ugly after soldering wires directly to terminals, and make a male connectors from a piece of a copper bus for them:


- Finish assembling AC part of our mini-UPS.

- Connect the remaining wires to the battery modules, then hot glue the charging circuit to each module:

- Solder power supplies to battery modules. Prepare the connectors to connect batteries and power supplies to perfboard.

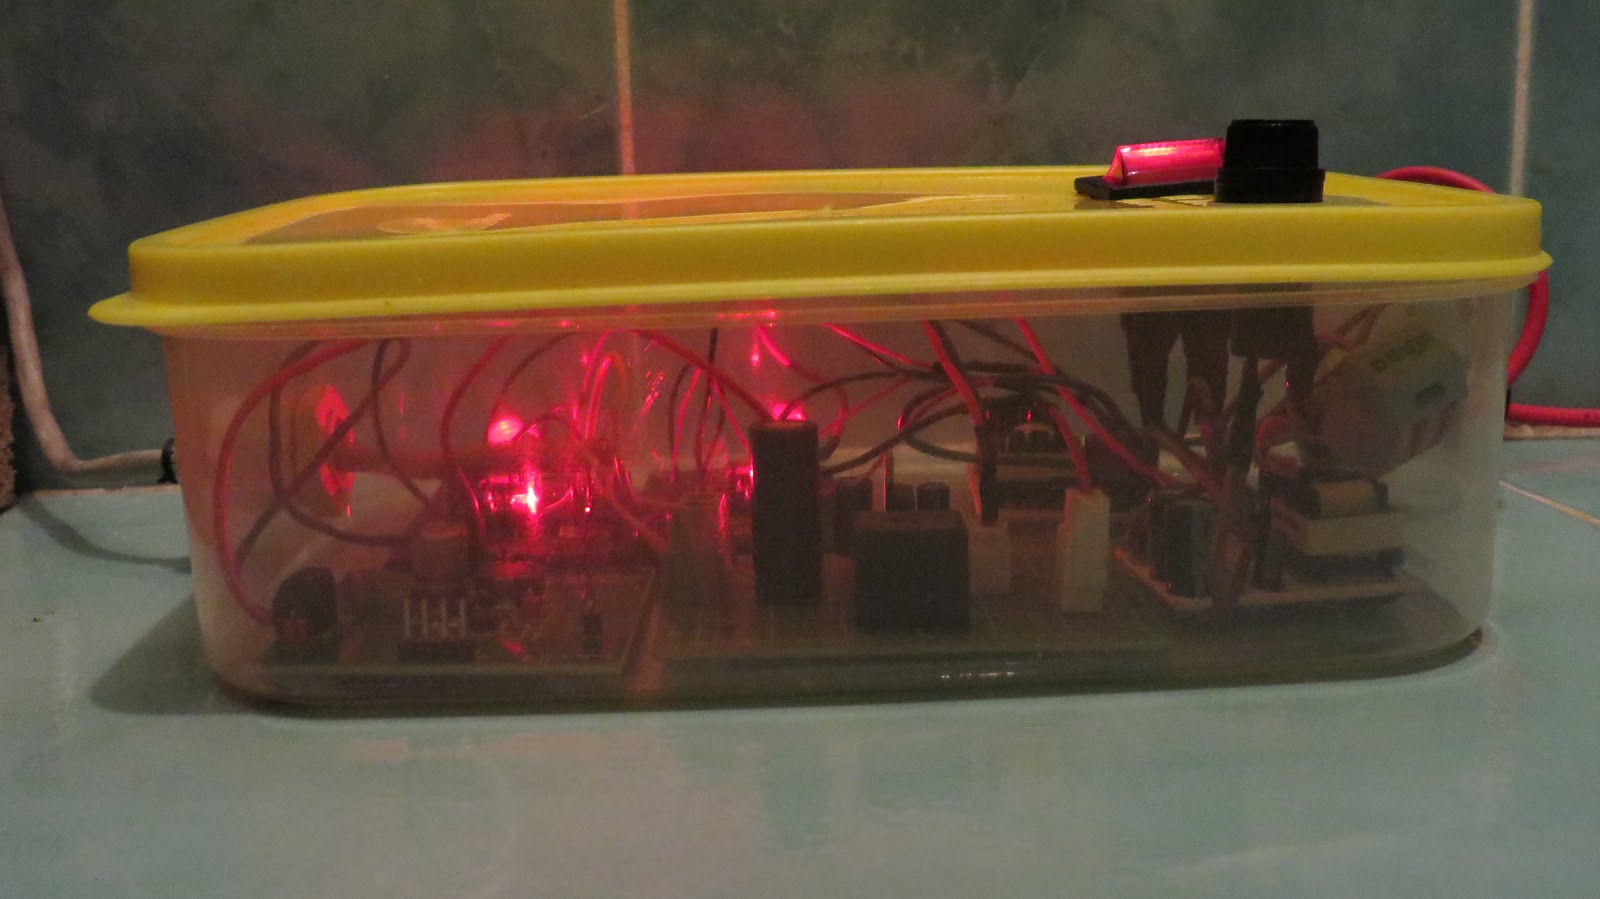
- Assemble the switching and regulating parts of the circuit on the perfboard.


- The only thing left now is to arrange everything neatly inside the box. If you used connectors, it'll be easy:
- Hot-glue everything to the bottom of the box. Test that it works (mine didn't work after assembly, turns out I connected 5V and GND to a single spot. Pay attention to details when soldering!).

- Switch the circuit breakers off (Safety first!11).

- I grabbed mains voltage from a nearby wall socket and carefully hid the wire behind the door frame. You can think of something more clever/visually appealing.

- Hook up mini-UPS and switch circuit breakers on. When the power on, the batteries should start charging (red light) and eventually reach full charge (blue light).
Congratulations! You are now a proud owner of a tankless gas water heater that works come rain or shine, and does not require changing the batteries.
Side view:


Comments
Post a Comment